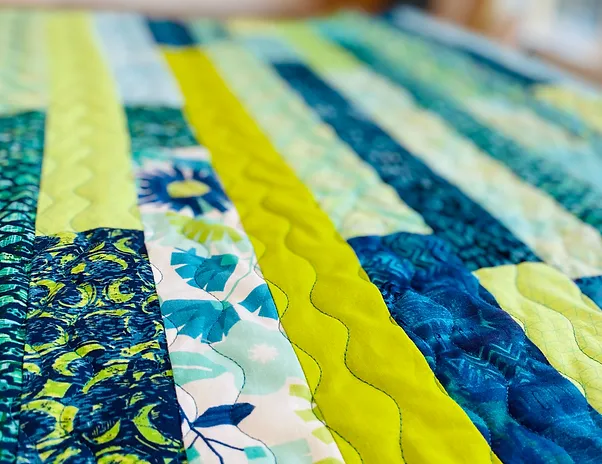
Halloween Mug Rug

Hi, I’m Susan from Sewfeet.com and I’ve just started my holiday sewing. From Halloween to New Year’s Day, there are lots of opportunities to sew, making costumes, seasonal home décor items, and gifts for friends and family. My first holiday project is for Halloween, a simple hexagon mug rug made of triangles.

Quilters Select 60 Degree Ruler

This specialty ruler is the perfect tool for making this hexagon-shaped project. Use it to cut equilateral triangles and half triangle up to 8 ½”. It is also useful for cutting diamonds up to 16”. You can learn more about the 60 degree ruler here.

Six Triangles

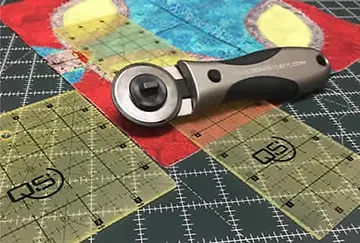
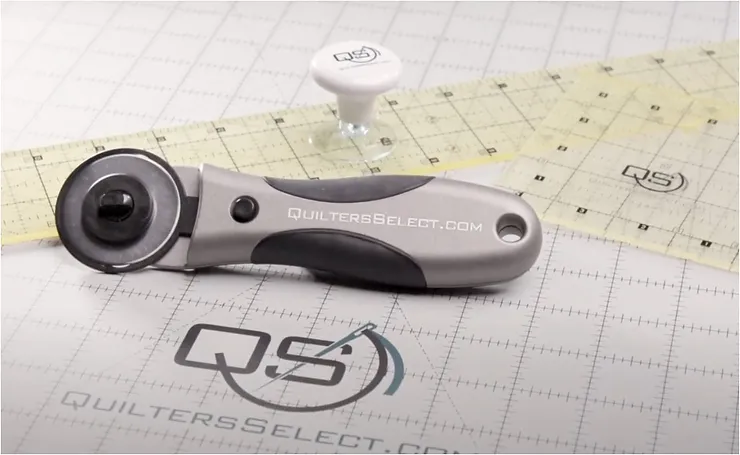
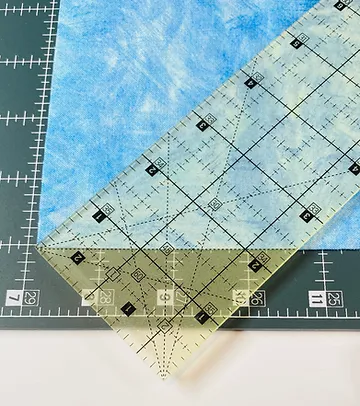
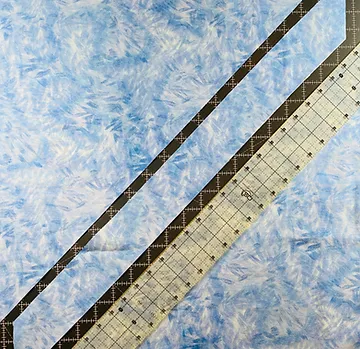
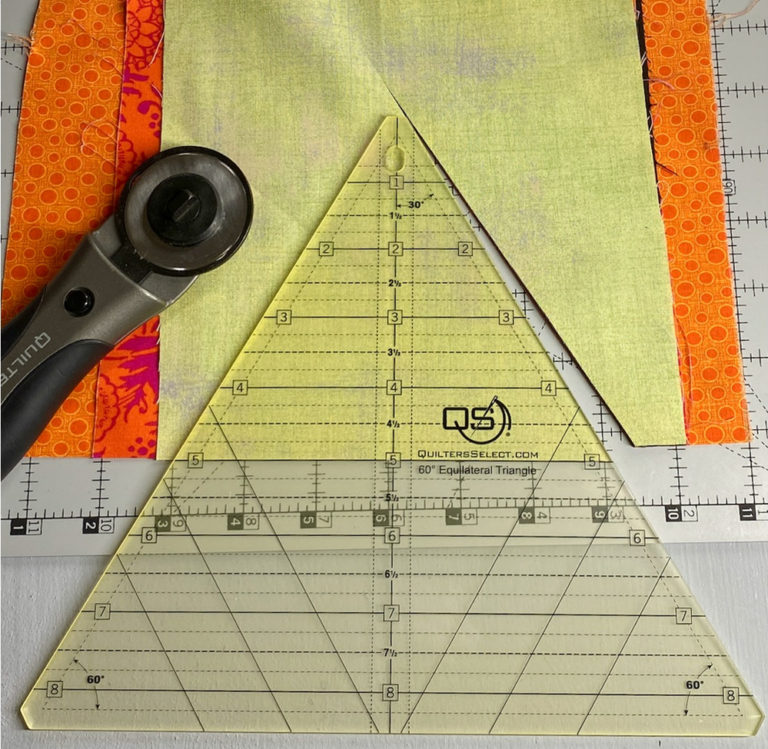
For this project I cut six 5” triangles, each one from a different fabric. The fabrics are in Halloween colors and when stitched together form a hexagon that can be used as a mug rug or a candle mat. I used fabric scraps and stacked the fabrics to cut all six triangles at the same time. Using the QS  rotary cutter helped make this easy to do. The extra weight of this cutter helps to easily cut through multiple layers. Also, the non-slip coating on the back of the QS ruler keeps it from slipping on the surface of the fabric. Here’s how I cut out the triangles:

  1. Trim one edge of the fabric that becomes the lower straight edge of the triangle. 
  2. Position the 5” line on the straight edge.
  3. Trim the sides and the top of the triangle. The clipped top of the triangle makes it easier to accurately piece the triangles and it minimizes the trimming once the triangles are sewn together. 
 

Join the Triangles

Stitch three triangles together and trim the dog ears. Press the seams open. This reduces the bulk in the center of the hexagon when all of the triangles are sewn together.  Repeat the stitching and pressing with the remaining three triangles together.  Place the two sets of three right sides together and stitch the center seam.

Quilting the Hexagon

Place the hexagon on a 10” square of batting. I’m using my favorite fusible batting – Embellish Premium Fusible Batting. I like it because it has more loft that other fusible battings I have used. I fused the batting to the wrong side of the hexagon and then trimmed the excess batting around the edges of the hexagon. Next, I used the hexagon to cut out the backing and adhere it to the  batting using temporary spray adhesive.

You can use any style of quilting on this project, but I went with a minimal look. I sewed a line of straight stitching ¼” away from each side of the seam lines – six lines of stitching to accent the triangular shapes. I used an open toe foot so I could position each seam next to the inside toe of the foot. Then, I adjust the needle position toe stitch ¼” away from the seam.

Finishing

The final step is to finish the edges. It is a good idea to overcast the edges to “seal” them before covering them. I used an overlock presser foot with an overlock stitch to compress the edges, resulting a cleaner edge that is easier to finish.

Have you started your holiday sewing? It’s still early so you have plenty of time to make beautiful and useful items to celebrate all of the holidays!

I finished the edges by couching a textured yarn on top of the overlock using the open toe foot and a zigzag stitch.

6 Tips to Sew Beautiful Decorative Stitches

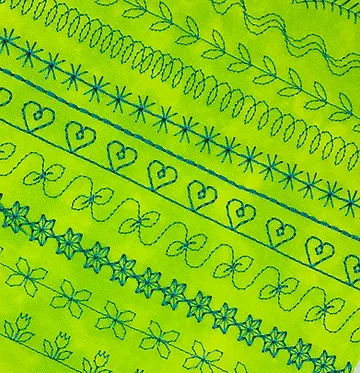
Today’s sewing machines have hundreds of wonderful decorative stitches and I love them! Hi, I’m Susan with sewfeet.com and this post is about how to make sure that you get the best-looking decorative stitches from your sewing machine. These stitches can be used to enhance almost any type of project that you are making. Garments, home dec items, purses, tote bags, toys, bed linens, and so much more! So, pay attention to the tips below and beautify your next project with decorative stitches!

Stitch Tip #1 – Carefully Select Your Needle and Thread

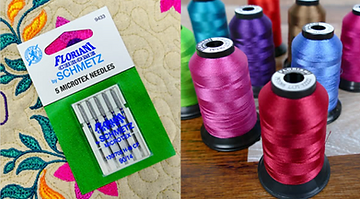
The type of thread you use when sewing decorative stitches is crucial to sewing beautiful stitches. I use Floriani 40-weight embroidery thread, which is a polyester thread with a high sheen that makes your decorative stitches shine! There are over 300 colors of this strong thread, and it is colorfast. Equally important is the needle you use. I like Microtex needles for decorative stitching. This needle has a slim point that is sharp which means it that it is very precise as it stitches, and precision is important when decorative stitch patterns are being formed. Microtex needles come in sizes 60-90 and you should use the size appropriate to your fabric. Floriani Chrome needles by Schmetz are stronger (less breakage) and last much longer than regular needles. It goes without saying (but I’ll say it anyway) that you should always start any decorative stitch project with a new needle!

Stitch Tip #2 – Use the Correct Presser Foot

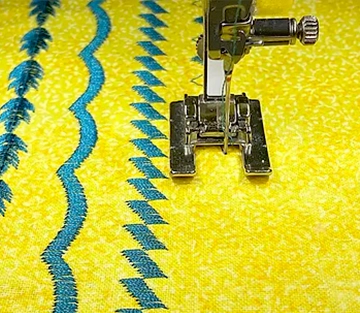
To get the best results when sewing decorative stitches, make sure you have the appropriate presser foot on your machine. The all-purpose foot that came with your machine works well for stitching open decorative stitches. This includes double- or triple-stitched straight stitches. The sole of the foot is almost flat with small indentations that allow the thread to easily pass under the needle. I like to use a clear all-purpose foot so I can see the stitching area under the presser foot.

Use a Satin Stitch Foot or an Embroidery (not machine embroidery) Foot for heavier decorative stitches. These are designed with satin stitches and need a foot with a wider and deeper indentation on the sole. This allows the extra thread build-up to move smoothly under the foot, letting the stitch pattern form correctly with no distortion. I use an open embroidery foot that has a wide area between the toes so I can see exactly where the needle is and what part of the stitch pattern it is sewing.

Stitch Tip #3 – Stabilize Your Fabric

Most fabrics need some support when sewing decorative stitches to prevent tunneling or puckering. This can be an interfacing, either sew-in or fusible. Or it can be an embroidery stabilizer such use tearaway, cutaway, or washaway, depending on what the project needs. CLICK HERE to read a recent post of mine about the basics of using these stabilizers.

Stitch Tip #4 – Watch Your Speed

Another great feature of machines today is that they sew very fast, which can be a great timesaver. However, when sewing decorative stitches, it is usually best to regulate the speed (if you have that option on your machine) according to the complexity of the stitch pattern. Simple patterns usually are fine with a faster motor speed, but more intricate designs may work best with a slower speed. I usually stay at medium to low speed to get the best results.

Stitch Tip #5 – Fingertip Guiding

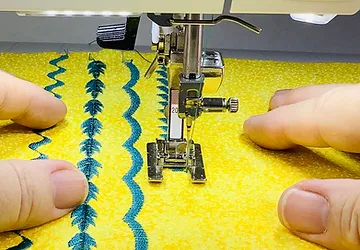
When sewing decorative stitches, the machine moves the fabric as needed to form the pattern. The feed dog shifts back and forth and side to side, depending on the design. When this happens, it may be difficult to sew a straight line or keep the fabric from swaying from side to side as it goes under the needle. The best way to control this is to put one hand on each side of the needle area, lightly placing your fingertips on the fabric. Do not push or pull the fabric but let it slide under your fingers as it is being pulled by the feed teeth. This controls the movement without interfering with the formation of the stitch pattern.

Stitch Tip #6 – Make a Stitch Book

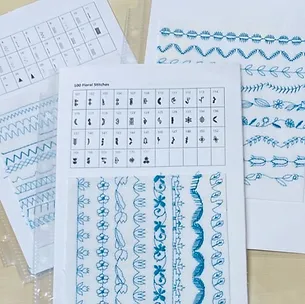
If you really want to play with your decorative stitches, see what you have, and plan a few projects, you should make a stitch book! Sew out all of the stitches on your machine and keep it as a reference for future projects. CLICK HERE to see my Sewfeet blog post that gives you Three Reasons to Make a Stitch Book. 

Fuse and Piece Quilt Block

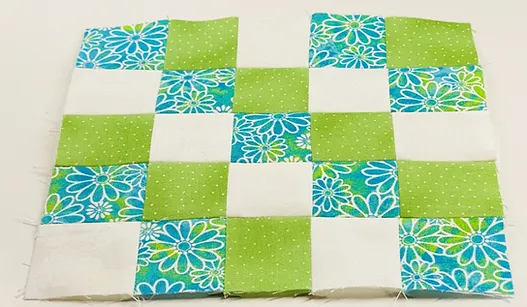
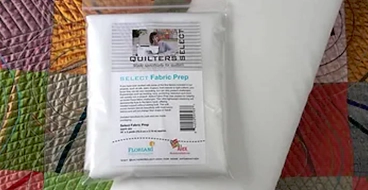
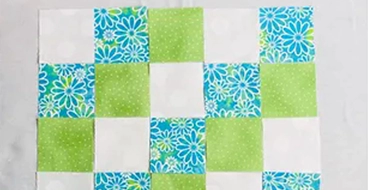
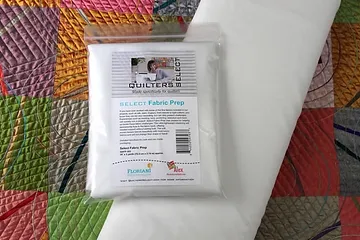
Hi, I’m Susan from Sewfeet.com and recently I wrote a post on several types of interlinings that add support and body to your fabric for various applications. In this post, I’m going to focus on one of the interlinings, Select Fabric Prep, and show you another use for it. You can piece this 8” block stitching only 8 seams instead of 24 with traditional piecing.

Supplies

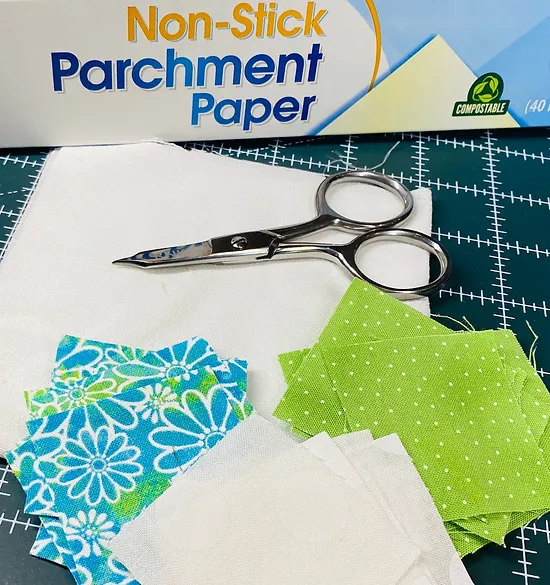
  • 25 pieces of quilting cotton, 2” squares, to make a quilt block that is 8” square, finished
  • Fabric Prep, 10” x 10” – add at least 2” to the block height and width when cutting the Fabric Prep.’
  • Press Cloth (I used Parchment Paper)
  • Small pair of scissors with sharp, narrow tips such as RNK Precision Tip scissors
  • Patchwork Presser Foot (quarter inch foot)

Select Fabric Prep

Place the Fabric Prep on a pressing surface (I use my wool pressing mat) with the fusible side up. This lightweight fusible fabric adds very little bulk or weight to your quilt block. It also stabilizes the block, preventing distortion.

Placing the Squares

Starting in the center of the Fabric Prep, position the 2” squares right side up in straight rows with the edges meeting, but not overlapping. I had three fabrics, 8 squares of two of the fabrics, and 9 of the third fabric. I arranged them in a stair step formation.

Fusing the Squares

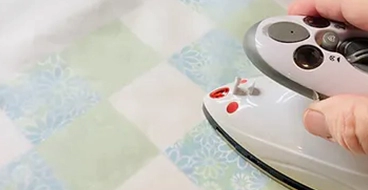
Using a press cloth or parchment paper, fuse the squares to the fusible web, moving the iron up and down, rather than sliding it. Once the squares are fused, trim the excess Fabric Prep even with the quilting cotton edges.

Patchwork Presser Foot

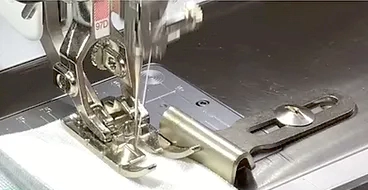
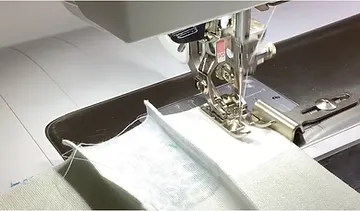
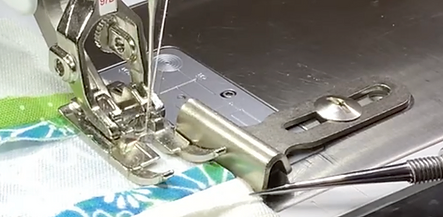
Attach your quarter inch foot to the machine. I used BERNINA Foot #97 and aligned the edge of the foot with the fabric edge. I also used a guide that attached to the bed of my machine. It forms a wall that gives you added help for consistently guiding the edge of the fabric to get a precise ¼” seam.

Stitching the First Four Seams

Fold the block along the “seam” between the first and second rows, then press. Stitch the seam, placing the edge of the presser foot along the pressed fold for a ¼” seam allowance. Repeat this for the three remaining seams that are parallel to the first.


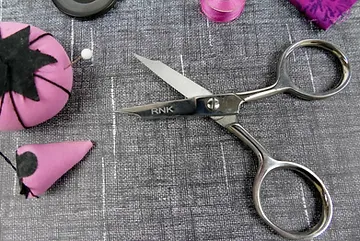
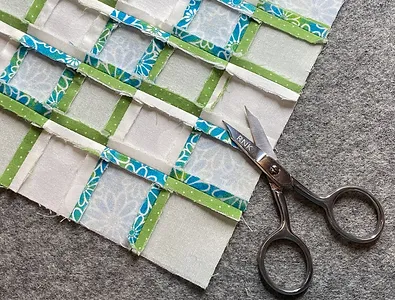
Once the seams are stitched, use a small pair of scissors with sharp, narrow tips to open the seam. I used the RNK Precision Tip scissors. The micro tips fit into the seam easily to cut along the fold. Press the seams open.

Stitching the Last Four Seams

Repeat the last two steps for the remaining four seams that run perpendicular to the first four. It helps to use a stiletto to make sure the seam allowances stay flat as you stitch.

Using the RNK Precision Tip scissors, open the last four seams and press them flat.

Turn the block over and press from the right side. I hope you try this piecing method. It is especially useful when you are piecing squares or rectangles, making it easy to perfectly match the intersection of the blocks.

Visit Susan at SewFeet.com


An Old Applique Technique with a New Tool to Make It Easier

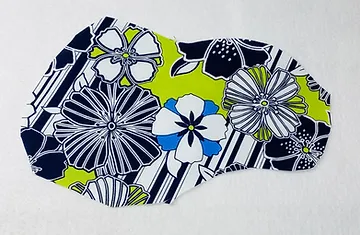
Appliqué is a fun technique with many variations. Hi, I’m Susan from Sewfeet.com and in this post, I want to show you an appliqué technique from the 17th century that stitchers are still using today! Broderie Perse is a French phrase that means Persian embroidery. The appliqué shapes for this technique are cut from printed fabric. Originally, the shapes were cut from printed chintz, which usually was covered with large floral patterns and was a very expensive fabric. Stitching the flowers or other motifs on plain fabrics was a way to stretch the use of the prettier, more costly chintz fabric.

Appliqué Supplies

  • A fabric with a large print consisting of motifs you can fussy cut to use as appliqué shapes.

  • Small Scissors – I used RNK Precision Tip Scissors – the best I’ve ever used for fussy-cutting and precise trimming of appliqué shapes. These scissors are new to me and turned out to be the perfect tool for the fussy cutting required for this technique.

  • Background fabric that coordinates with the large print motifs – usually a solid or subtle print that lets your chosen motifs be seen. The amount depends on your project. I am working on a 10” square.

  • 40-wt Floriani embroidery thread in a color that coordinates with the background for quilting. You can use this same thread for the appliqué technique or choose a different color for contrast. I matched my background thread with the fabric color and chose black for the appliqué stitching.

Fusible Web & Batting

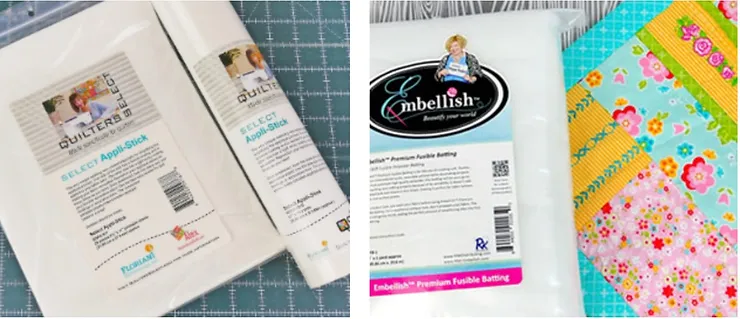
  • Select Appli-Stick – a fusible web from Quilters Select used for adhering the appliqué shapes to the background fabric.
  • Embellish Premium Fusible Batting – my fabric choice for a soft quilted look, also a 10” square.

Again, depending on your project, you may or may not use batting. If not, you will need interfacing and/or stabilizer.

Presser Feet

You’ll need a presser foot for quilting the background – I used an all-purpose presser foot. My project is small, and the fusible batting prevents the layers from shifting. If you are working on a larger project, you may want to use a walking foot. I also used a free-motion presser foot for the appliqué stitching.

Quilting the Background

Fuse the Embellish Premium Fusible Batting to the wrong side of the background fabric. Quilt the fabric as desired. I selected a running stitch, which looks like a rounded zigzag stitch. I selected this stitch because it creates a nice texture when stitching repetitive lines of it across the fabric. I sewed horizontal lines using the edge of the presser foot for spacing. Once quilted, set the background fabric aside.
Preparing the Appliqué Shapes

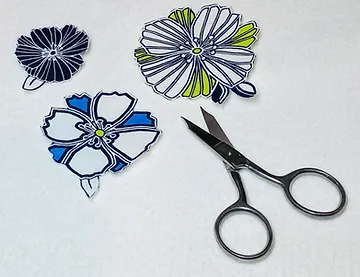
Select the desired motifs from the large print fabric and rough-cut around the shapes in one piece that can be backed with fusible web. Peel the paper off one side of the Appli-Stick fusible web and apply the exposed adhesive side to the wrong side of the rough-cut print fabric.

Fussy Cutting

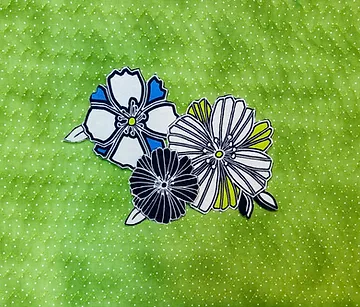
Using the RNK Precision Tip Scissors, cut out the desired motifs. These scissors are small, giving you control as you cut. The finger holes are large, so they are comfortable to use. One of the things I like about these scissors is that the tips are very narrow, and they cut all the way to the end. The micro-sized tips are great for getting into tiny hard-to-reach places that need to be trimmed.

Arranging the Appliqué Shapes

Arrange the trimmed motif as desired on the quilted background fabric. The Select Appli-Stick fusible web has adhesive on both sides. It is repositionable so you are able to move the shapes around until you have the look you want. Once you do, take a photo to use as a reference as you are stitch. If the motifs are overlapped, remove the upper ones to expose the lower layer. Fuse the lowest flower to the fabric and stitch according to the directions below. After stitching each shape, fuse the next one, using your photo as a guideline for placement. Stitch this one in place and continue this method until all of your motifs are stitched.
Stitching the Appliqué Shapes

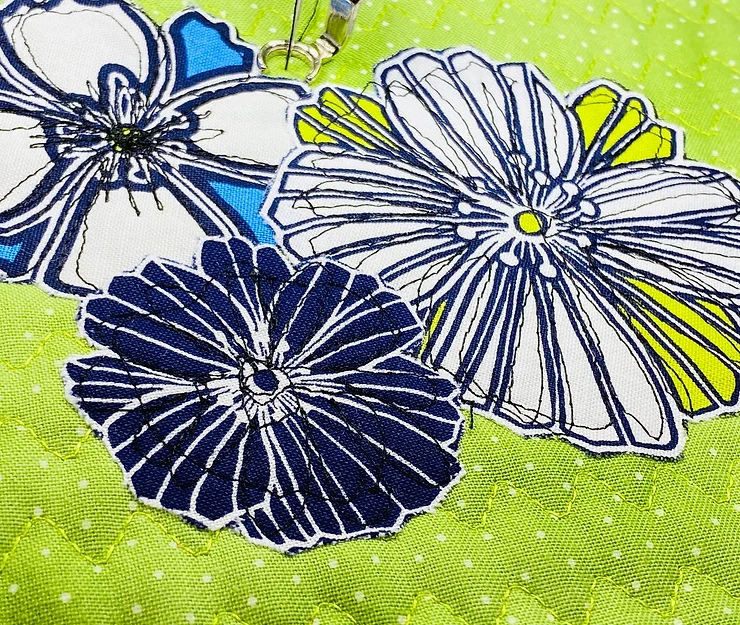
Of course, in the 17th century, the appliqué shapes were stitched to the background by hand. The raw edges of the shapes were turned under using the tip of the needle, and then stitched to the background fabric. Today’s version of Broderie Perse may be stitched using any applique technique such as satin stitch, blanket stitch, raw edge, or free-motion stitching. I secured my shapes using free-motion stitching, adding a little thread painting to add details to the fused motifs. After attaching the free-motion presser foot to my machine, I lowered the feed dog so I could move the fabric. I pulled the bobbin thread up to the surface of the fabric and then I moved the fabric under the needle to secure the flower shapes. You can be precise with your free-motion stitching or as loose and free as you want while “doodling” over the appliqué shapes.

For more information from and about Susan, visit her at Sewfeet.com.

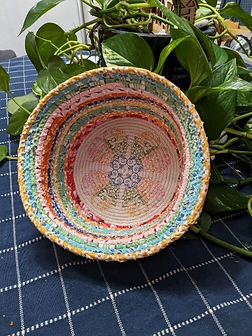
Clarrisa’s Corner: Embroidered Rope Bowl

Here’s What you’ll need:

• Clothesline rope. There are different thicknesses but any cord will work.

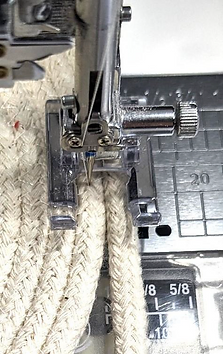
• A pressure foot that has a channel on the bottom so the cord will feed through the channel. I also like an open toe foot to allow me to see where I am stitching.

• An extension table for your machine if you have one.

• (optional) Quilter’s Select Para cotton poly thread. I like this thread because it’s very thin and strong. I use this in the bobbin as well.

• An 80/12 denim or microtex needle.

• A Quilter’s Select Glue Stick

• A Quilter’s Select Erasable Marker

• A Quilter’s Select ruler any size from 5” to 8” square.

• Quilter’s Select Quilting Clips.

• Size 90/14 Embroidery Needle.

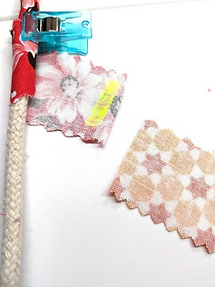
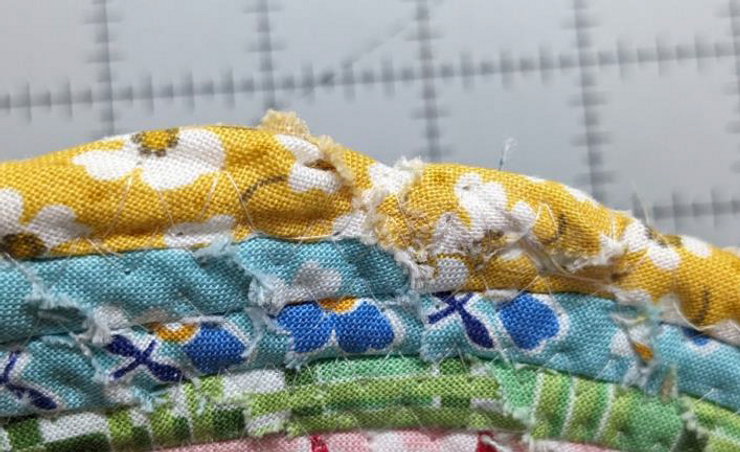
• A pinking or zig zag rotary cutter blade. Use this to cut your strips. Less fraying.

• Various strips of 1 ¼” wide fabric. I used a jelly roll and cut the strips in half.

• Floriani Perfect Stick Cutaway to fit your hoop.

• Floriani Water Soluble topper.

• (optional) A piece of RNK Deco Magic, Floriani Stitch n Shape or 3 layers of Floriani Fusible Cutaway to stiffen the bottom of the Basket.

Create the bottom of the Basket

1. Thread your machine with the Quilter’s Select Para Cotton Poly thread in the top and bobbin.

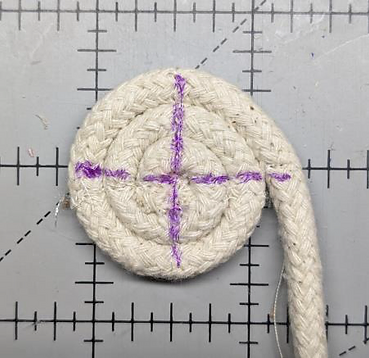
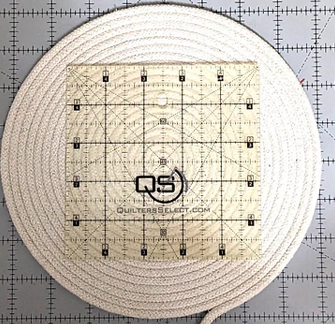
2. Roll the cord into a coil until it’s about 1 ¼” wide. Hold in place and straight stitch across and at a 90 degree angle.

You will need to stitch multiple times both directions. To do that, end with your needle down, turn the coil and stitch again where you previously stitched. Mark the stitching lines with your QS marker. Make sure the excess cord in on the right side of the coil.

3. Set your machine for a zig zag stitch with the length at 3mm and width at 4mm. Attach your open toe foot with the channel and set your needle to stop down. Attach your extension table and slow the speed of your machine.

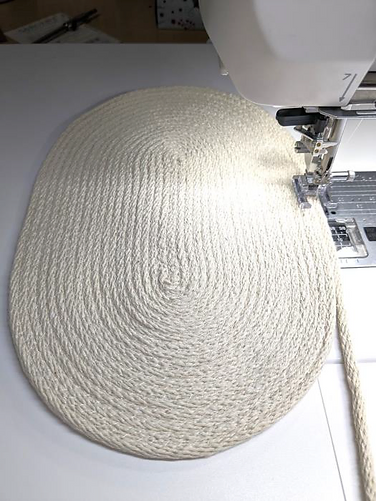
4. Place the coil under the pressure foot and line the up the area where the cords meet with the center of the pressure foot. Slowly zig zag the cords together. Stitch a few stitches at a time. As you stitch, stop with the needle down, raise the pressure foot and pivot. If you are having trouble catching both cords, you can widen your stitch. It may also help if you shorten your stitch a bit.
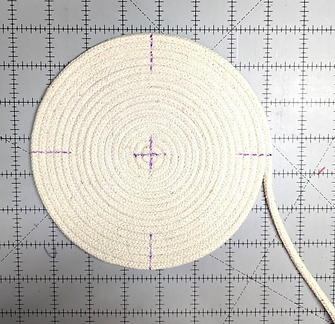
5. Continue turning and stitching. As you stitch, place your hand on top of the piece to keep it flat. Also, try not to pull the cord too tightly as you stitch.
6. Turn and stitch until your piece measures at least 7” wide and complete the stitching.

Create the bottom of the Basket

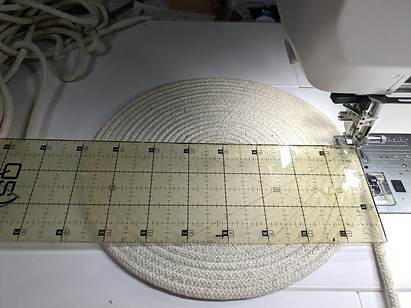
1. Visually center your QS square ruler over the stitched base piece.

2. Using the ruler, mark the centers on all 4 sides.

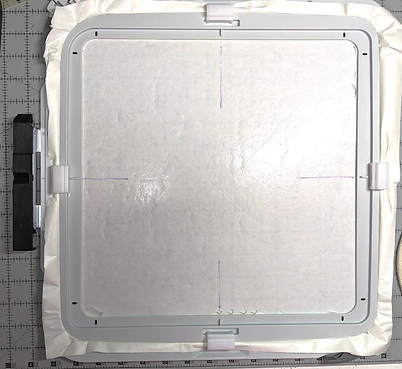
3. Hoop a piece of Floriani Perfect Stick Cutaway. Score and remove the paper. Using the marks on the hoop and a ruler, mark all 4 centers on the stabilizer.

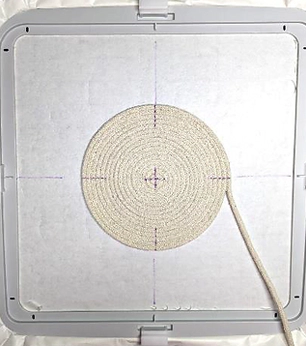
4. Place the bottom piece on the stabilizer, lining up the marks. Make sure the cord is coming off the right side.

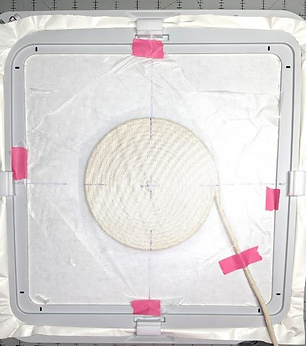
5. Place 2 layers of Floriani Water Soluble topper on top. Tape in place with the Emb. Perfection Tape.

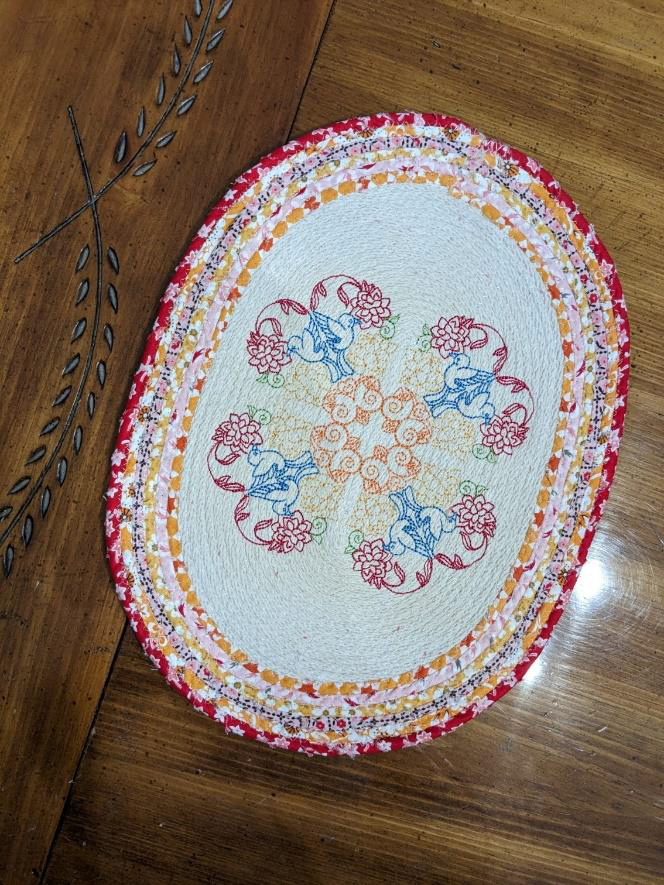
6. Slow your machine down and insert the 90/14 embroidery needle. Embroider your design. Your pressure foot should “float” above the cord. If your pressure foot is touching or pushing on the cord, you may need to raise your pressure foot.

7. Remove the Water Soluble topper, lift and remove the bottom from the stabilizer. Cut the stabilizer as close as you can to the stitching.

8. Dampen the remaining topper with a water bottle and use a damp wash cloth to wipe away the rest.


Create the bottom of the Basket

(optional)I find it helpful at this point to fuse a piece to the bottom to stiffen it. The products used for this are listed in the supplies list above.

• Place the bottom on the base product and trace around it.

• Cut out the piece and fuse it to the back of the bottom piece.

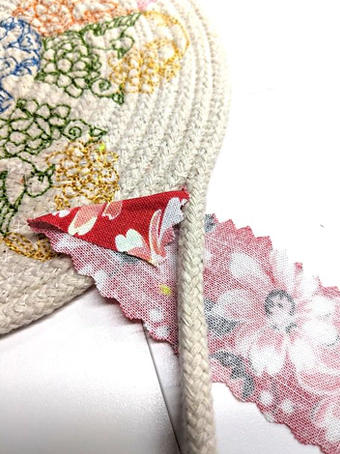
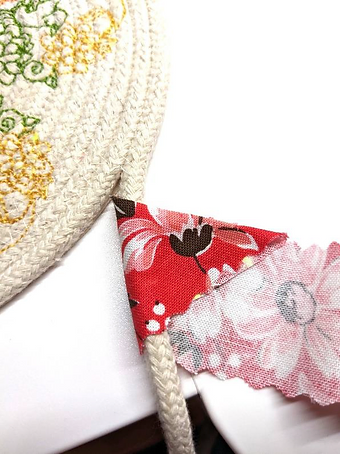
1. Place the end of the first fabric strip under the cord, wrong side up. Use the glue stick to glue the end to the wrong side at a 45-degree angle.

2. Fold the folded end up to the top edge of the fabric strip, over the cord. Glue in place.

3. Wind the strip around the cord one time. Use a QS quilting clip to hold the beginning in place.

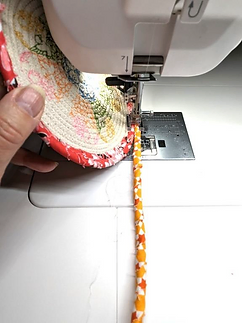
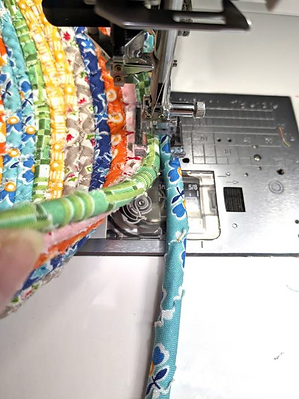
4. Continue winding the fabric strip around the cord. Keep the strip at about a 45-degree angle to the cord as you wind. Wind around the cord twice, hold the cord, place 2 fingers on the backside of the strip on the machine bed and pull your fingers away from the cord to tighten the fabric. See the Clarrisa’s Corner video for August 3rd. https://www.facebook.com/FlorianiEmbroidery/videos

5. At this point you can wind a little at a time or choose to wind the entire length of the fabric strip. Either way, place

a QS clip at the end of your winding to hold the strip in place.

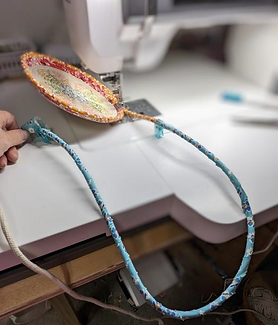
6. To form the shape of the basket you will need to lift the base up toward the head of the machine as you stitch the strips on. The more you lift the base, the deeper the curve of the basket. It also helps to pull the cord as you stitch it on.

7. Continue stitching and lifting the base until the end of the fabric strip. To attach a new strip, glue the beginning of the new strip to the end of the previous strip with the QS glue stick. Carefully begin winding the next strip and place a clip where the strips intersect.

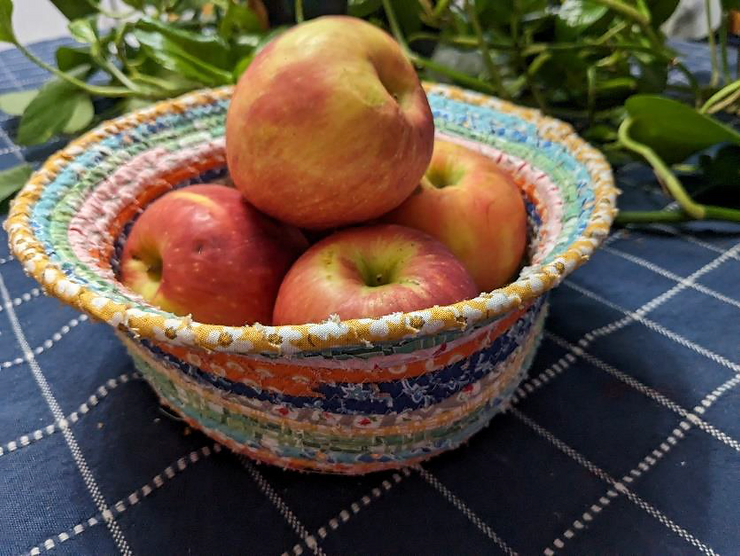
8. Continue winding, lifting and stitching until the basket it the size you want.

9. To end, cut the cord and continue winding the fabric strip about ½” past the cord. Glue the fabric to the cord and itself.

10. Tuck the end over the top of the previous row and stitch on top of the previous row. Reverse and stitch again.

OPTIONS

Create the bottom of the Basket

• Instead of turning the basket toward the head of the machine while stitching, pull the edge of the basket up and feed in extra cord while you stitch. Push the wrapped cord into the center of the foot as you stitch.
Create the bottom of the Basket

• Begin by folding a length of the cord in half and stitch the halves together. The longer the length of cord, the longer the finished oval shape.

• Stitch the cord around the edge of the folded center cord

Benefits of Rotary Cutting

One of the best advances (in my opinion) in sewing tools over the last few decades has been rotary cutting tools. Hi, I’m Susan with Sewfeet.com and in this post, I’m showing you the cutting tools I use plus my favorite way to cut bias binding. These tools are from Quilters Select tools from RNK Distributing.

Why Use a Rotary Cutter?

Scissors have been around for about 2,000 years and sewers exclusively used them to cut fabrics for making garments. In 1979, a new tool was introduced for fabric cutting and sewists everywhere (especially quilters) embraced this new way to cut fabric. So, what’s the big deal? Why is rotary cutting so popular and what does it add to the sewing and quilting processes? Here are a few reasons:

  • The rotary cutter has a round blade that rolls over the fabric, leaving a cleaner cut than scissors.

  • It is easier to cut a perfectly straight edge with a rotary cutter.

  • Cutting is faster and easier on the hands when using a rotary cutter instead of scissors.

  • You can cut multiple layers of fabric with a rotary cutter. The number of layers depends on the type of fabric you are using, the size of your cutter, and the sharpness of the blade.

  • Rotary cutting for quilting projects is much easier and far more accurate than it is when using scissors. This means it is easier to sew your patterns together, resulting in a perfect patchwork pattern and the exact size block you want.


Why Use a Rotary Cutter?

The cutter is only one piece that you need for rotary cutting. You will also need a cutting mat to protect your table surface as you cut, and a straight edge ruler to cut against, so your edges are clean and straight. I’ve used several different types of cutters, mats, and rulers over the years, but I finally found ones that always give me great cutting results. The Quilters Select cutting tools are high-quality and have some unique features. They are sold wholesale to retail sewing and quilting businesses. To find a Quilters Select retailer near you, go to:

Why Use a Rotary Cutter?

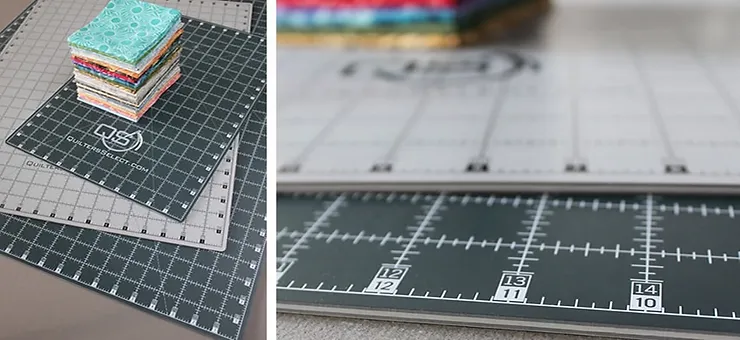
These mats are multilayer, and you can use either side, so it’s like you are getting two mats in one! It has ⅛”, ¼”, ½” ¾” and 1” markings on each side, so you can measure as accurately as you need. The one-inch lines have two sets of corresponding numbers that are placed around the perimeter of the mat. You can read them left to right and right to left so you never lose your place or have to count backwards! Even with all those markings, the surface of the mat is not busy. These markings are easy to see and simple to read. One side of the mat is dark with white markings and the other is light with dark markings.

Rotary Cutter

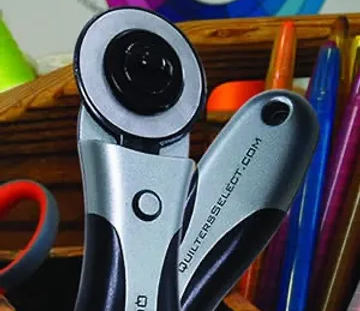
The Select Rotary Cutter is the best one I have ever used! You’ll notice a difference from other cutters the second you pick it up. It is weighted and this makes it easier to cut single layers as well as multiple layers. The weight helps you cut with less effort, so it is easier on your hands. The Select Rotary Cutter has an innovative ambidextrous design that lets you precisely cut from the left or right side. It is available in 45mm or 60mm blade sizes, with replacement blade packs for both!

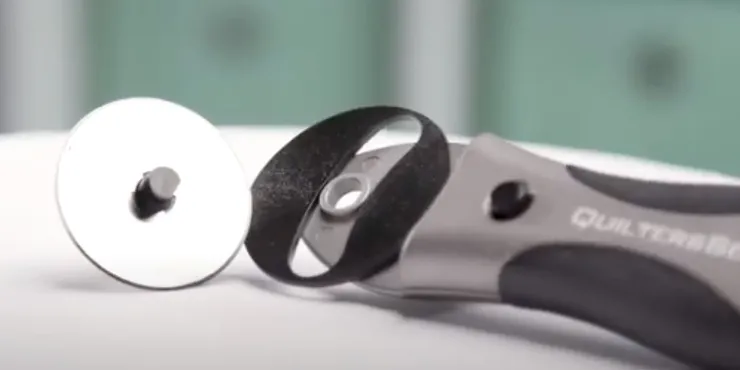
The blade on the Select Rotary Cutter is simple to change because it is magnetized. CLICK HERE to watch Alex Anderson as she shows you how to easily use the cutter and change the blade.

QS Rulers

There are two things I like best about QS rulers. One is the non-skid coating on the back. It keeps your ruler flat against the fabric with no slipping or sliding as you cut. The second is how easy it is to read the markings. Just like the dual-sided mats, the surface is markings are clean and clear, making them easy to read.

QS Rulers

Using the ruler to cut bias strips using the 45-degree line is simple to do. If you haven’t learned this way of cutting bias strips, I encourage to give it a try because it is easier and more accurate than any other method. First of all, I used the QS ruler that is 2 ½” x 36”. This is the perfect ruler to use because it is the exact width I need to make binding. Because it is 36”, I can cut long strips and have less piecing. Cut the amount of fabric you need, just like it comes off the bolt with selvedge edges together. Make sure it is folded evenly. Find the 45-degree line on your ruler. The ruler I’m using has the line at one end. Place the 45-degree line on the fold of the fabric. The places the long edge of the ruler exactly where it needs to be to cut on the bias.

Once you have the ruler placed, cut along the edge of the ruler, which is the true bias grain of the fabric. Continue cutting the fabric the width of the ruler until you have the number of strips you need.

For more information about the QS rulers, CLICK HERE to see a previous blog post about which to select for a beginner and how to organize them so they are easy to find them when you need them.

For more information from and about Susan, visit her at Sewfeet.com.

What’s Inside Your Sewing Project?

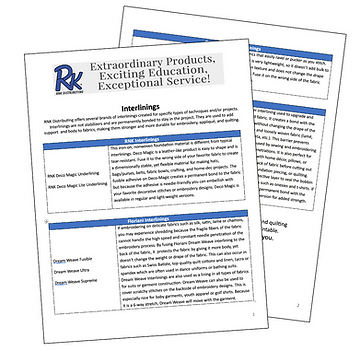
Hi, I’m Susan from Sewfeet.com and today’s post is about what happens inside your projects as you create them. I’m going to focus on one type of material, which is interlining, but first, let’s look at two additional materials that are similar but used for different purposes. Even the names of all of them are somewhat similar and it can be confusing to keep them straight. The interlinings in this post are distributed by RNK Distributing and I’ve made a FREE Printable that gives you the details at a glance so you can easily decide what you need for your next quilted project.

Interfacing

First, there is interfacing, which is a layer of material that is placed on the wrong side of your main fabric. It is often used for garment sewing to add body and support to certain parts of the garment. It comes in two types, woven and non-woven, and each of those are available in sew-in and fusible options. Interfacings come in different weights so you can add light or heavy weight support as needed. It is mostly used in areas that need some shape and support, such as collars, cuffs, and jacket openings. It is always used in an area where you plan to stitch buttonholes.

Lining

Next, let’s talk about lining. It is a separate fabric, stitched to the edges of a garment with right sides together. When the fabrics are turned so the right sides are out, the lining hangs loose in most garments such as jackets and coats. Lining fabric is typically very lightweight, so it doesn’t add bulk to the project. And it is often a slippery material that makes it easy to slide the garment on and off. A garment (usually jackets and coats) may have both interfacing and lining. Other projects such as purses, totes, and zippered pouches are often lined but the fabrics used are usually similar to the outer fabric, such as quilting cotton.

Interlining

And third, interlining, is another layer that can be used to add support to your fabric. It also fuses to the wrong side of the fabric. There are several reasons to use interlining for your project. If you have a limp, lightweight fabric when you need something with more body, interlining may help. You simply fuse or sew it to the wrong side of the fabric and then treat the two layers as one piece of fabric. You can do this after you have cut out the pieces of your project, but an easier way is to fuse the interlining to the uncut fabric, and then cut out the pieces. Interlining can make your fabric stronger and more durable, and in some cases, it can make your garment warmer, and it can let you shape the fabric as needed to suit your project. All of these depend on the type of interlining you use. RNK Distributing has several types of interlining used for different purposes.

Interlining

Designed to be used for fabrics that easily ravel or pucker as you stitch. It has a permanent bond but is very lightweight, so it doesn’t add bulk to your fabric. It has a soft woven texture and does not change the drape of the fabric to which is fused. Fuse it on the wrong side of the fabric using a silk setting on your iron.
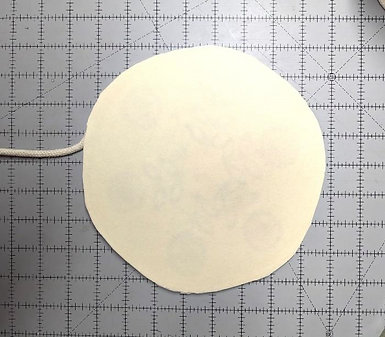
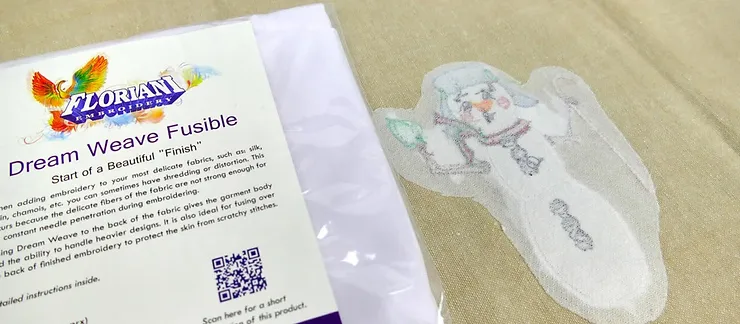
Floriani Dream Weave

This interlining comes in three versions, Dream Weave Fusible, Dream Weave Ultra, and Dream Weave Supreme. They are used for delicate fabrics such as silk, satin, lame or chamois. The fragile fibers of these types of fabric cannot handle the high speed and constant needle penetration during the embroidery process. By fusing Floriani Dream Weave Fusible to the back of the fabric, it protects the fabric by giving it more body, yet doesn’t change the weight or drape of the fabric. This can also occur in fabrics such as Swiss Batiste, top quality quilt cottons and linen, or spandex which are often used in dance uniforms and bathing suits. Dream Weave Interlinings are also used as a lining in all types of fabrics for suits or garment construction.

Floriani Dream Weave

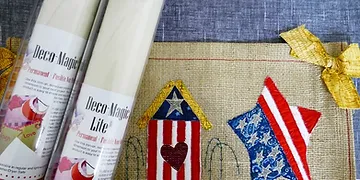
This iron-on, nonwoven foundation material is different from typical interlinings. Deco Magic is a leather-like product is easy to shape and is tear-resistant. Fuse it to the wrong side of your favorite fabric to create a dimensionally stable, yet flexible material for making hats, bags/purses, belts, fabric bowls, crafting, and home-dec projects. The fusible adhesive on Deco-Magic creates a permanent bond to the fabric but because the adhesive is needle-friendly you can embellish with your favorite decorative stitches or embroidery designs. Deco Magic is available in regular and light-weight versions.

I recently made a fabric tray using Deco Magic and I love how it gives structure and body to it. CLICK HERE for instructions to make this fabric tray.

Don’t forget to down the FREE Printable on RNK Interlinings. RNK Distributing is a wholesale distributor of sewing and quilting products that include the ones discussed in this blog posts. Go to RNKDistributing.com to find a retailer near you.

For more information from and about Susan, visit her at Sewfeet.com.

Clarrisa’s Corner: Key Fob

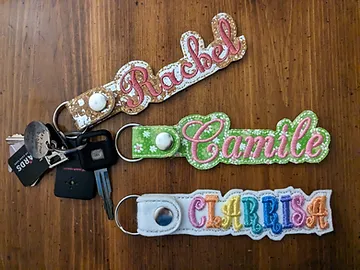
This week on Clarrisa’s Corner, join Clarrisa Gossett as she walks you through creating adorable key chain fobs. Download files below!

Cork Inspiration

Cork Inspiration

One of my favorite non-fabric materials to sew is cork. Hi, I’m Susan from Sewfeet.com. One of the reasons I like cork fabric is that it is a versatile fabric that can be used to make a variety of projects, such as purses, tote bags, placemats, tablet totes, table runners, and so much more. I like the natural look of it and even though it seems as if it may be difficult to sew, it is really easy to work with. In today’s post, I’II show you a few decorative pillows where I’ve selected cork to accent the fabrics used to make the pillows. First, here are a few tips to consider when you sew on cork fabric.
Cork Fabric Selection

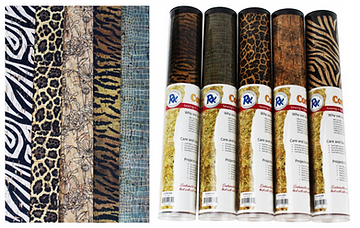
I use cork fabric from RNK Distributing and have a lot of choices. Besides a true cork fabric, they have many printed cork fabrics that give you a lot of creative possibilities. For the pillows below, I used a different cork fabric for each one, which gives completely different looks to each pillow.

Don’t Use Pins

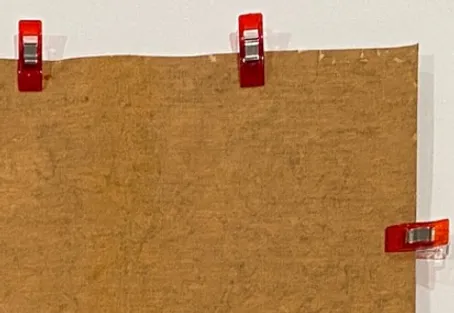
 Cork has many of the same properties as leather, and one of them is that pins and needles create holes that do not close the way fabrics do. Once you put a pin or needle in the cork, the hole remains forever. Use clips in place of pins to hold the pieces together for stitching. This also means be very careful where you stitch. Make sure you are stitching where you need to because you don’t have do-overs when sewing on cork.

Don’t Use Pins

In most cases, a regular all-purpose presser foot moves smoothly over the cork surface, but if the foot drags at all, you should change to a non-stick or coated presser foot to let the cork move easily under the needle. Another option to try if the fabric is not moving smoothly is to decrease the pressure foot pressure. Lighten the pressure slightly and test the movement until you can stitch normally on the cork fabric.

Don’t Use Pins

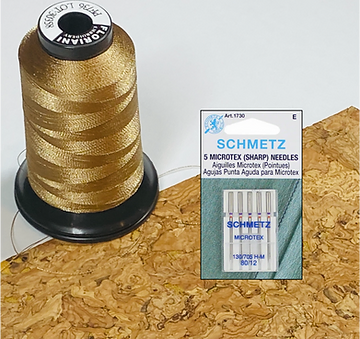
I use a Microtex, size 80/12 needle because it has a sharp point, and it easily penetrates the cork fabric. Use the smallest size needle that works with your thread to minimize the size of the holes the needle is making. I used Floriani 40-wt embroidery thread on the pillows shown.

Stitching Cork

When stitching cork, use a longer than normal stitch length. I use a 3 mm setting. If the length is too short, it can perforate the surface of the cork. Cork does not ravel so there is no need to finish the edges unless you prefer the look of a finished edge. The seam allowances may be topstitched to keep the seam flat and less bulky.

Pillow #1 - Copper Stripes Pillow

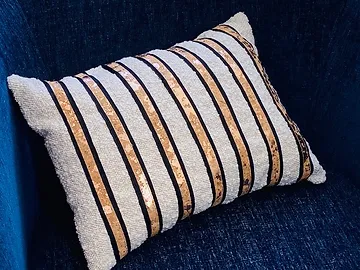
This pillow is 20” x 12”, made from a textured upholstery fabric. I added vertical strips on the front, stitching cork that has gold accents on top of black ribbons. This is an easy way to dress up a pillow with small amounts of cork fabric.

Pillow #2 - Garden Flange Pillow

This simple-to-sew flange pillow is made of two 18” squares of black fabric. One has a square of cork fabric (with a fun garden design printed on it) placed in the center and edgestitched along all four edges. The fabrics are placed together with the wrong sides and then stitched just outside of the cork square, leaving one side open. Insert the pillow form or stuffing, pushing it down into the pillow, and sew the opening closed. Massage the pillow to even out the sorm or stuffing.

Pillow #3 - Zebra Accent Pillow

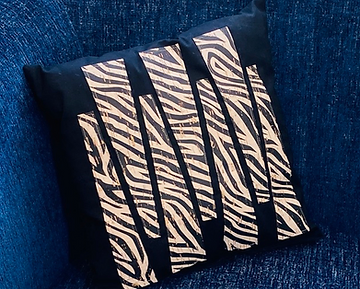
This look of this little black 14” square pillow is elevated with a few applique shapes across the front. I cut seven triangles from a zebra-printed cork fabric and snipped off the top point of each triangle. I then arranged the shapes by alternating the orientation and placing four of them even with the lower edge (leave room for the seam allowances). The remaining three are even across the top of the pillow.

Cork Inspiration

I hope these pillows inspire you to want to work with cork fabric. No matter what project you make, I’m sure you’ll love how easy it is to create with cork, and how beautiful the results are.

For more information from and about Susan, visit her at Sewfeet.com.

Which Batting Should You Choose?

When making a quilt, the batting plays an important part in the look and feel of the finished quilt. Hi, I’m Susan from Sewfeet.com and this post is about several types of specialty battings that can be used to make quilts and other quilted projects such as purses, placemats, diaper bags, wall hangings, art quilts, and more. The battings in this post are distributed by RNK Distributing and I’ve made a FREE Printable that gives you the details at a glance so you can easily decide what you need for your next quilted project. CLICK HERE to download the printable pages about Specialty Battings.

RNK Embroidery Batting

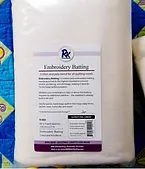
A blend of cotton and polyester, this batting is needle punched to prevent stretching, puckering, and shrinkage. It does not require additional stabilizer when embroidering, making it ideal for in-the-hoop quilting projects and embroidered quilts. This Batting can also be used for quilts, wall hangings, purses, baby items, jackets, home dec items, and more.

RNK Hot N Cold Barrier Fleece

This insulated fleece is made from polyester and mylar. It is useful when making a project that needs to keep items cold and/or hot. Lunch bags, Casserole covers, Oven mitts, Potholders, Beverage koozies, and Shopping Bags are just a few possibilities. This fleece is heat-resistant but not heat- or fire-proof. An extra layer of cotton batting is recommended if making oven mitts or potholders. Click HERE for instructions on making a Tabletop Trivet using RNK Hot N Cold Barrier Fleece as a layer between the front and back fabrics.

RNK Sew-Fab-Foam

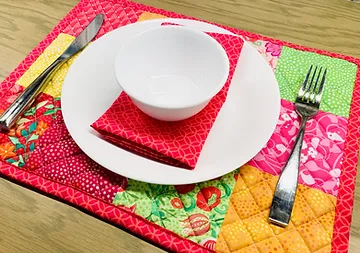
A soft, fabric-lined foam stabilizer with one fusible side, which eliminates the need for pinning the fabric. Easy to quilt and embroider through, the stitching is more defined than stitching with a low-loft batting. Using this foam stabilizer in place of batting gives a professional look to Handbags, Purses, Tablet totes, Diaper bags, Camera cases, Eyeglass cases, and more. CLICK HERE for directions to make a Quilted Placemat project using Sew-Fab-Foam.

Floriani Heat n Sta Fusible Fleece

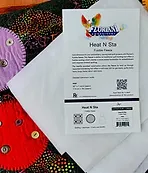
A soft, fabric-lined foam stabilizer with one fusible side, which eliminates the need for pinning the fabric. Easy to quilt and embroider through, the stitching is more defined than stitching with a low-loft batting. Using this foam stabilizer in place of batting gives a professional look to Handbags, Purses, Tablet totes, Diaper bags, Camera cases, Eyeglass cases, and more.

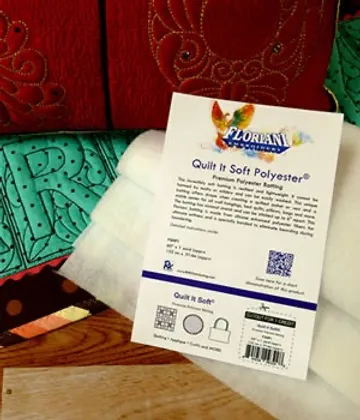
Floriani Quilt It Soft Polyester Batting

This incredibly soft foundation is resilient and lightweight. It cannot be harmed by moths or mildew and can be easily and safely machine washed. The specialized technique used to create this unique batting offers drape when creating a quilted jacket or vest but also has a stable center for highly embellished or very simple wall hangings, bed quilts, pillows, bags and more. Ideal for trapunto, Sashiko, and in-the-hoop quilting projects! The batting has minimal stretch and can be stitched up to 6” apart.

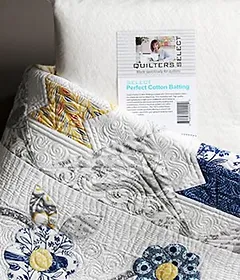
Quilters Select Perfect Cotton Batting

Made from 100% long staple cotton, this batting is made with no chemicals and no bleaching. It has a scrim (foundation) that helps to control stretching and movement during quilting and embellishing. Good for machine and hand quilting with stitching up to 8 ½” apart.

Quilters Select Soft Blend Batting

This incredibly soft batting is resilient and lightweight. It cannot be harmed by moths or mildew and can be easily and safely machine washed. The specialized technique used to create this unique batting offers drape when creating a quilted jacket or vest but also has a stable center for highly embellished or very simple wall hangings, bed quilts, pillows, bags and more. Ideal for trapunto, Sashiko, and in-the-hoop quilting projects! The batting has minimal stretch and can be stitched up to 6” apart.

Quilters Select Soft Wool Batting

This wool batting is lightweight and breathable while offering insulation and warmth. It has natural moisture-wicking properties, and resists bearding and fiber migration. Quilting should be up to 4” apart.

Embellish Angel Loft Bamboo Batting

A blend of 50% cotton and 50% bamboo, this batting is soft, which means that your finished quilt will have a beautiful drape. It is an embroidery batting that has a needled stabilizer in the center that does not stretch. The embroidery or quilting stitches can be sewn 8”-10” apart and it will hold up to 40,000 stitches in a 5” x 7” hoop. CLICK HERE for to see how to make a simple quilt using this bamboo batting.

Embellish Premium Fusible Batting

This soft, flexible batting is perfect for embroidered quilts, T-shirt quilts, table runners, garments, home décor, quilted jackets, purses, bags and more. The fusible coating won’t shadow through on light color fabric or produce dimples on the fabric surface. Because the fuse is permanent, you don’t have to quilt the fabric, but it can be quilted by machine or hand as desired. CLICK HERE to see my Gratitude Journal that I quilted using Embellish Premium Fusible Batting.

Don’t forget to download your FREE printable all about specialty batting below!

RNK Distributing is a wholesale distributor of sewing and quilting products that include the ones discussed in this blog posts. Go to RNKDistributing.com to find a retailer near you.

For more information from and about Susan, visit her at Sewfeet.com.