Cork Inspiration

One of my favorite non-fabric materials to sew is cork. Hi, I’m Susan from Sewfeet.com. One of the reasons I like cork fabric is that it is a versatile fabric that can be used to make a variety of projects, such as purses, tote bags, placemats, tablet totes, table runners, and so much more. I like the natural look of it and even though it seems as if it may be difficult to sew, it is really easy to work with. In today’s post, I’II show you a few decorative pillows where I’ve selected cork to accent the fabrics used to make the pillows. First, here are a few tips to consider when you sew on cork fabric.

Cork Fabric Selection

I use cork fabric from RNK Distributing and have a lot of choices. Besides a true cork fabric, they have many printed cork fabrics that give you a lot of creative possibilities. For the pillows below, I used a different cork fabric for each one, which gives completely different looks to each pillow.

Don’t Use Pins

 Cork has many of the same properties as leather, and one of them is that pins and needles create holes that do not close the way fabrics do. Once you put a pin or needle in the cork, the hole remains forever. Use clips in place of pins to hold the pieces together for stitching. This also means be very careful where you stitch. Make sure you are stitching where you need to because you don’t have do-overs when sewing on cork.

Don’t Use Pins

In most cases, a regular all-purpose presser foot moves smoothly over the cork surface, but if the foot drags at all, you should change to a non-stick or coated presser foot to let the cork move easily under the needle. Another option to try if the fabric is not moving smoothly is to decrease the pressure foot pressure. Lighten the pressure slightly and test the movement until you can stitch normally on the cork fabric.

Don’t Use Pins

I use a Microtex, size 80/12 needle because it has a sharp point, and it easily penetrates the cork fabric. Use the smallest size needle that works with your thread to minimize the size of the holes the needle is making. I used Floriani 40-wt embroidery thread on the pillows shown.

Stitching Cork

When stitching cork, use a longer than normal stitch length. I use a 3 mm setting. If the length is too short, it can perforate the surface of the cork. Cork does not ravel so there is no need to finish the edges unless you prefer the look of a finished edge. The seam allowances may be topstitched to keep the seam flat and less bulky.

Pillow #1 - Copper Stripes Pillow

This pillow is 20” x 12”, made from a textured upholstery fabric. I added vertical strips on the front, stitching cork that has gold accents on top of black ribbons. This is an easy way to dress up a pillow with small amounts of cork fabric.

Pillow #2 - Garden Flange Pillow

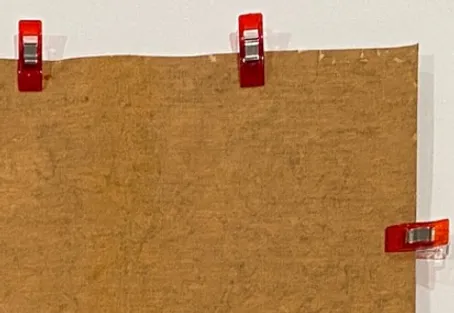
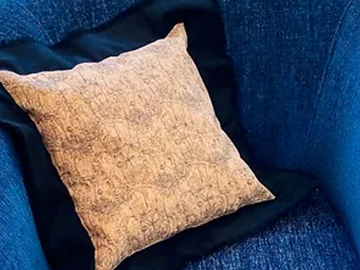
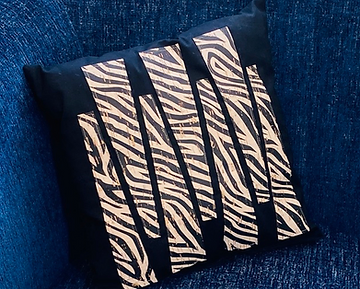
This simple-to-sew flange pillow is made of two 18” squares of black fabric. One has a square of cork fabric (with a fun garden design printed on it) placed in the center and edgestitched along all four edges. The fabrics are placed together with the wrong sides and then stitched just outside of the cork square, leaving one side open. Insert the pillow form or stuffing, pushing it down into the pillow, and sew the opening closed. Massage the pillow to even out the sorm or stuffing.

Pillow #3 - Zebra Accent Pillow

This look of this little black 14” square pillow is elevated with a few applique shapes across the front. I cut seven triangles from a zebra-printed cork fabric and snipped off the top point of each triangle. I then arranged the shapes by alternating the orientation and placing four of them even with the lower edge (leave room for the seam allowances). The remaining three are even across the top of the pillow.

Cork Inspiration

I hope these pillows inspire you to want to work with cork fabric. No matter what project you make, I’m sure you’ll love how easy it is to create with cork, and how beautiful the results are.

For more information from and about Susan, visit her at Sewfeet.com.