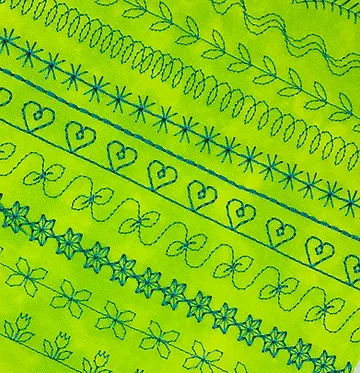
Today’s sewing machines have hundreds of wonderful decorative stitches and I love them! Hi, I’m Susan with sewfeet.com and this post is about how to make sure that you get the best-looking decorative stitches from your sewing machine. These stitches can be used to enhance almost any type of project that you are making. Garments, home dec items, purses, tote bags, toys, bed linens, and so much more! So, pay attention to the tips below and beautify your next project with decorative stitches!
Stitch Tip #1 – Carefully Select Your Needle and Thread
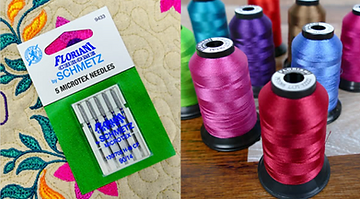
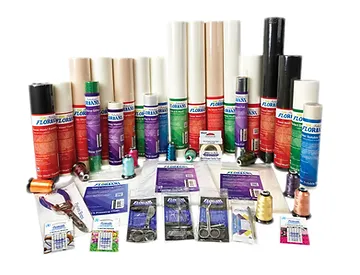
The type of thread you use when sewing decorative stitches is crucial to sewing beautiful stitches. I use Floriani 40-weight embroidery thread, which is a polyester thread with a high sheen that makes your decorative stitches shine! There are over 300 colors of this strong thread, and it is colorfast. Equally important is the needle you use. I like Microtex needles for decorative stitching. This needle has a slim point that is sharp which means it that it is very precise as it stitches, and precision is important when decorative stitch patterns are being formed. Microtex needles come in sizes 60-90 and you should use the size appropriate to your fabric. Floriani Chrome needles by Schmetz are stronger (less breakage) and last much longer than regular needles. It goes without saying (but I’ll say it anyway) that you should always start any decorative stitch project with a new needle!
Stitch Tip #2 – Use the Correct Presser Foot
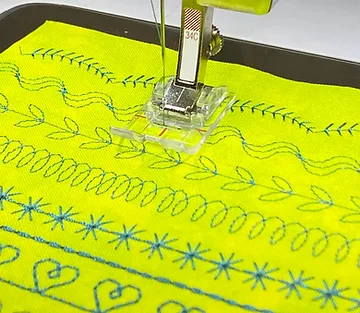
To get the best results when sewing decorative stitches, make sure you have the appropriate presser foot on your machine. The all-purpose foot that came with your machine works well for stitching open decorative stitches. This includes double- or triple-stitched straight stitches. The sole of the foot is almost flat with small indentations that allow the thread to easily pass under the needle. I like to use a clear all-purpose foot so I can see the stitching area under the presser foot.
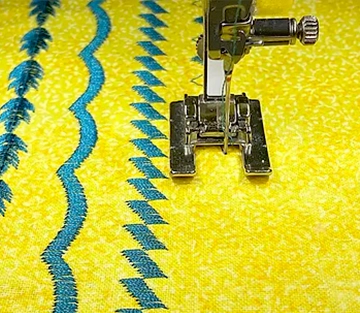
Use a Satin Stitch Foot or an Embroidery (not machine embroidery) Foot for heavier decorative stitches. These are designed with satin stitches and need a foot with a wider and deeper indentation on the sole. This allows the extra thread build-up to move smoothly under the foot, letting the stitch pattern form correctly with no distortion. I use an open embroidery foot that has a wide area between the toes so I can see exactly where the needle is and what part of the stitch pattern it is sewing.
Stitch Tip #3 – Stabilize Your Fabric
Most fabrics need some support when sewing decorative stitches to prevent tunneling or puckering. This can be an interfacing, either sew-in or fusible. Or it can be an embroidery stabilizer such use tearaway, cutaway, or washaway, depending on what the project needs. CLICK HERE to read a recent post of mine about the basics of using these stabilizers.
Stitch Tip #4 – Watch Your Speed
Another great feature of machines today is that they sew very fast, which can be a great timesaver. However, when sewing decorative stitches, it is usually best to regulate the speed (if you have that option on your machine) according to the complexity of the stitch pattern. Simple patterns usually are fine with a faster motor speed, but more intricate designs may work best with a slower speed. I usually stay at medium to low speed to get the best results.
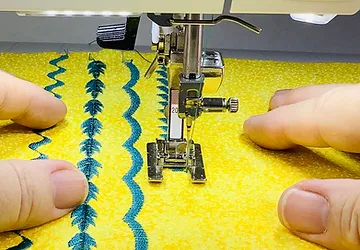
Stitch Tip #5 – Fingertip Guiding
When sewing decorative stitches, the machine moves the fabric as needed to form the pattern. The feed dog shifts back and forth and side to side, depending on the design. When this happens, it may be difficult to sew a straight line or keep the fabric from swaying from side to side as it goes under the needle. The best way to control this is to put one hand on each side of the needle area, lightly placing your fingertips on the fabric. Do not push or pull the fabric but let it slide under your fingers as it is being pulled by the feed teeth. This controls the movement without interfering with the formation of the stitch pattern.
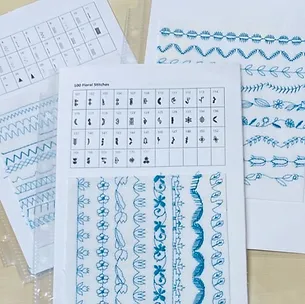
Stitch Tip #6 – Make a Stitch Book
If you really want to play with your decorative stitches, see what you have, and plan a few projects, you should make a stitch book! Sew out all of the stitches on your machine and keep it as a reference for future projects. CLICK HERE to see my Sewfeet blog post that gives you Three Reasons to Make a Stitch Book.