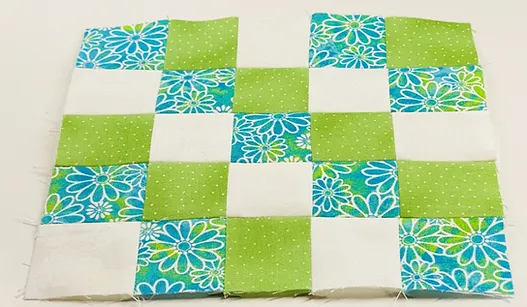
Hi, I’m Susan from Sewfeet.com and recently I wrote a post on several types of interlinings that add support and body to your fabric for various applications. In this post, I’m going to focus on one of the interlinings, Select Fabric Prep, and show you another use for it. You can piece this 8” block stitching only 8 seams instead of 24 with traditional piecing.
Supplies
25 pieces of quilting cotton, 2” squares, to make a quilt block that is 8” square, finished
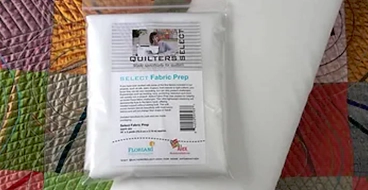
Fabric Prep, 10” x 10” – add at least 2” to the block height and width when cutting the Fabric Prep.’
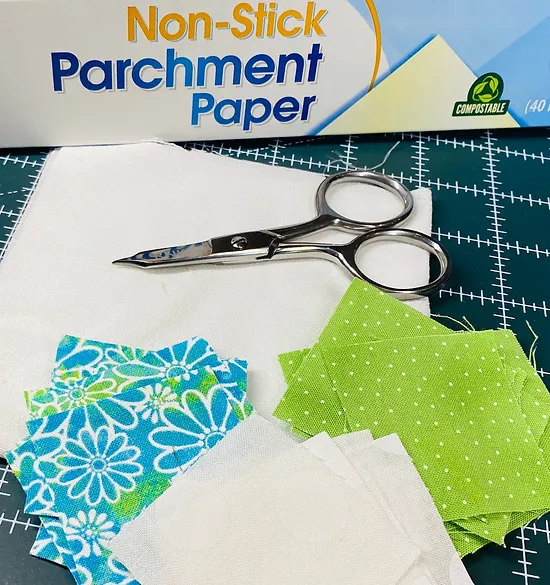
Press Cloth (I used Parchment Paper)
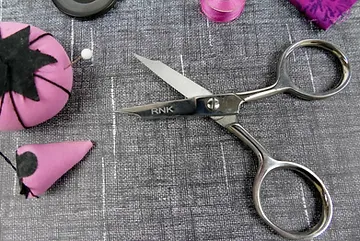
Small pair of scissors with sharp, narrow tips such as RNK Precision Tip scissors
Patchwork Presser Foot (quarter inch foot)
Select Fabric Prep
Place the Fabric Prep on a pressing surface (I use my wool pressing mat) with the fusible side up. This lightweight fusible fabric adds very little bulk or weight to your quilt block. It also stabilizes the block, preventing distortion.
Placing the Squares
Starting in the center of the Fabric Prep, position the 2” squares right side up in straight rows with the edges meeting, but not overlapping. I had three fabrics, 8 squares of two of the fabrics, and 9 of the third fabric. I arranged them in a stair step formation.
Fusing the Squares
Using a press cloth or parchment paper, fuse the squares to the fusible web, moving the iron up and down, rather than sliding it. Once the squares are fused, trim the excess Fabric Prep even with the quilting cotton edges.
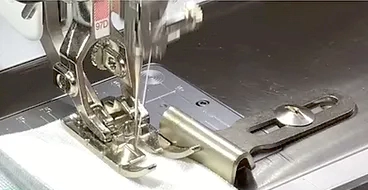
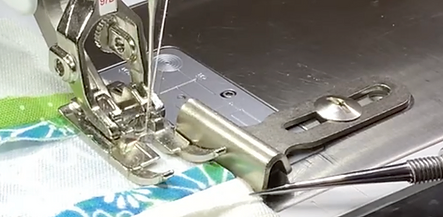
Patchwork Presser Foot
Attach your quarter inch foot to the machine. I used BERNINA Foot #97 and aligned the edge of the foot with the fabric edge. I also used a guide that attached to the bed of my machine. It forms a wall that gives you added help for consistently guiding the edge of the fabric to get a precise ¼” seam.
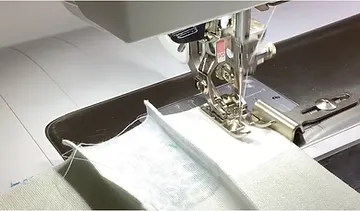
Stitching the First Four Seams
Fold the block along the “seam” between the first and second rows, then press. Stitch the seam, placing the edge of the presser foot along the pressed fold for a ¼” seam allowance. Repeat this for the three remaining seams that are parallel to the first.
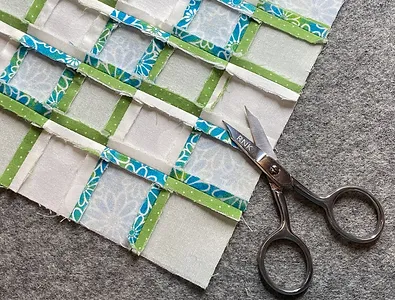
Once the seams are stitched, use a small pair of scissors with sharp, narrow tips to open the seam. I used the RNK Precision Tip scissors. The micro tips fit into the seam easily to cut along the fold. Press the seams open.
Stitching the Last Four Seams
Repeat the last two steps for the remaining four seams that run perpendicular to the first four. It helps to use a stiletto to make sure the seam allowances stay flat as you stitch.
Using the RNK Precision Tip scissors, open the last four seams and press them flat.
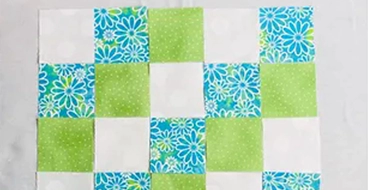
Turn the block over and press from the right side. I hope you try this piecing method. It is especially useful when you are piecing squares or rectangles, making it easy to perfectly match the intersection of the blocks.