Team Mud Mutt Vinyl

Team Mud Mutt Vinyl

Can we have more projects for our fur-babies?! The answer is, YES!

It’s Pet Week here at Create with RNK! This one is, well…. ADORABLE! How many times have you wished you can make your fur-baby a customized outfit?!


We can create Halloween costumes, Christmas costumes, BIRTHDAY PARTY OUTFITS!!! Ok, maybe not the last one. But party hats are acceptable, right?


Shinae used Cosplay HTV and our Quilters Select Craft N Cut!


Here is a FREE SVG to make your own Team Mud Mutt Outfit for your furbaby!


We hope you enjoy!

https://www.dropbox.com/sh/21zmp6dlpn6l7j5/AADTgCSwMtzIq9obThij7P5Ba?dl=0

Embroidered Pet Collar and Leash

Embroidered Pet Collar and Leash

It’s Pet Week here at Create with RNK! Clarrisa has made a special project for you!

Supplies:

  • 1” Wide plain pet collar or 1” wide leash-See Below for tips on embroidering the leash

  • Floriani Wet n Stick Gridded Stabilizer

  • Floriani Water Soluble Topper

  • RNK Embroidery Perfection Tape

  • Small piece of Floriani Template Tearaway or Embellish Sticky Printable Template-You can use some leftover scraps you have

  • Cellophane TapeA piece of printer paper

  • Floriani Precision Angle Tweezers-Love These!

  • Floriani Squeeze and Snip ToolLettering Design and or small embroidery designs

  • Floriani Thread for your embroidery designs

  • Bobbin Thread

  • Envelope Moistener


Prepare Embroidery Design:

1. I chose to add a name to my Collar. Some guidelines for creating lettering for a 1” wide Collar:

  • Choose a Font that has some width to the satin stitch of the letters. If you choose a thin letter design the letters will bury into the collar. I used “George” in Floriani Total Control Software

  • Make your lettering no more than .6 inches in height. Anything larger will tend to fall off the sides of the collar.Keep in mind that all fonts don’t stitch out well in smaller sizes. If you click the question mark next to the name of your chosen font in Floriani Total Control it will give a listing of the characters in that font and suggested sizes.Pictured below is the box that appears if you click the question mark.

  • Put additional space between your letters. I set the spacing at 2 in my Floriani Total Control Software.These were my settings for my chosen font.

  • If your chosen font has a lower case “y” it will make your font wider as the bottom of the “y” goes below the bottom of the other letters. You will want to select the “y”, slide it up a bit and decrease the height. This way you can still have the height with the rest of your lettering.

  • If you can, set the Grid in your workspace to show an inch. In Floriani Total Control you will go to “Program Preferences”Go to the “Environment” tab and set for inches then go to the “Grid” tab and set the SPACING at .25 for vertical and horizontal and GRID MAJOR for 4 for vertical and horizontal.Click OK and now your workspace will have a grid that shows an inch.

PRINT A TEMPLATE. . I like to print my templates in black and white to save colored ink. I also just print the design itself not the color order. Select your entire design and in the bottom left corner of your screen in Floriani Total Control, select the “thread color search” icon and enter 900 into the find color box. Click Find. Black will be highlighted in the color bar at the bottom with a box around it. Select it and the entire design will turn to black.


I use Floriani Template Tearaway or Embellish Sticky Printable Template for printing my templates. For a design this small you don’t need an entire sheet so this is where I save my scraps from other printed templates. Cut out a piece of Floriani Template Tearaway or Embellish Sticky Printable Template slightly larger than your design. Get a piece of regular printer paper and with cellophane tape, tape the small piece of template paper to the center of the regular paper. Make sure to secure both long edges securely so they won’t get stuck in your printer as the paper rolls through your printer. I used embroidery perfection tape so you can see where the tape is but you can use just regular cellophane tape.


Determine which side to put up in your printer. When printing you need to make sure it prints on the rough side of the template paper. In my printer I place the template paper rough side down. If you don’t know what side your printer prints on, make a mark on one sheet of regular printer paper. Load that into your printer with the mark side up and print something on it. If it prints on the mark side your printer prints right side up. If not you need to load the paper right side down to print.


Once you have your template paper loaded, click “print preview” the icon that looks like a printer in the top left corner of your screen. Click the “Settings” tab and a dialogue box will open and allow you to decide what you want to print. Here is what I set so it will only print the design and not the color list


Embroidery:

1. If you have the capability to scan with your embroidery machine, place a “snowman” sticker in the center of your printed template before you cut it out.

2. Rough cut your template close to your printed design. You may cut the “snowman” a bit as this design is so narrow.

3. At some point it would be helpful to try the collar on your pet.Of course it doesn’t matter on a leash. Once the collar is on, use a fabric marker and mark where you will put the design. Just an X will work.

4. Score the paper on the non-printed side of the template and remove backing paper.

5. Using the X that you marked when your pet had the collar on, line up and stick the template to the collar. I eyeballed this as the collar is narrow and I only needed to make sure the entire design was on the collar. need to move the sliders and buckles out of the way. Move them as far away as possible from the embroidery area.

6. Hoop a piece of Floriani Wet n Stick Stabilizer. Hoop the Wet n Stick with the grid on the stabilizer lined up with the vertical and horizontal marks on your hoop. I used my 5×7 hoop (130mmx180mm). You want the embroidery area larger than your design so you have room to stick the collar down. Watch the video to see how I get the stabilizer lined up while I’m hooping. 20200804_213109.mp4

7. Dampen the center area of the Wet n Stick with an envelope moistener. Not too much water! If you need to, spread the water around with your hand a little bit.

8. Align the template on the collar with the vertical and horizontal center marks on the Wet n Stick. You may have to lift each end to match the horizontal center.

9. Press down and hold for minute until the collar sticks to the Wet n Stick. Using RNK Embroidery Perfection Tape, tape each end of the design area to the Wet n Stick.

10. Load your design into your machine. If your Embroidery machine has the capability to adjust the weight of fabric you’re stitching on, set to a thicker fabric. My Embroidery machine has a setting in the “settings” menu to auto adjust for different weights of fabric.

11. Slow down the embroidery speed on your machine.

12. Using the placement system in your embroidery machine, center and align the embroidery design. If you can scan the embroidery area, scan the “snowman” so your machine will line things up for you. REMOVE THE TEMPLATE BEFORE STITCHING.

13. Place a piece of Water Soluble topper on top. Dampen the corners of the topper to stick down.

14. SLOWLY stitch out your design.

15.Once finished stitching, use your Floriani Precision Angle Tweezers, lift any thread tails

and trim closely with your Floriani Squeeze and Snip Tool on the front and back.

16. Remove the majority of the water soluble topper by tearing away and tear the collar away from the Wet n Stick.If it’s stuck down tight, just dampen the Wet n Stick again and it will come off easily.

17. Use your Floriani Precision Angle Tweezers again to pick out any remaining small pieces of Wet n Stick that remain.

18. Spritz the top with water to remove the remaining water soluble topper.

19. IF YOU CHOOSE, you can embroider additional designs on the collar. Once again make sure to move any buckles or sliders away from the embroidery area. RNK Embroidery Perfection Tape is the secret to getting the collar to stay in place on the Wet n Stick.


I used the remaining piece of Wet n Stick from my previous stitching as I can scan the area to get things lined up wherever I am in the hoop.


If you are embroidering designs with filled areas, in your software change the density to point 5. Point 4 is the default for most embroidery designs. Point 4 is a little dense for the thickness of the collar.


Hint….I used some of the “symbols” in Floriani Total Control for the hearts and flowers of this design. The symbols icon is located at the end of the toolbar on the top right. To use the symbols, click on the icon and a menu will show up in the “Properties Box”. Click the drop down arrow and select the symbol you want. Bring your cursor to the workspace and hold down the left click and drag your mouse to create the angle and size of the symbol you want. Once you get it how you want it let go of the mouse and you have your small design!


Leash Tips:

The principals for embroidering the leash are the same as the collar.

  • You may choose to embroider numerous times on the leash as you have more space.

  • Since the leash is more 2 sided I chose to match my bobbin thread to my top thread. I only had 2 color changes so it wasn’t too difficult.

  • I used the “Star 1” in the symbols menu of Floriani Total Control to create the stars to embroider. I stitched them once and they weren’t quite dense enough so I decided to stitch them twice to give them more depth. See above for how to use the symbols in FTCU.


Camp More, Worry Less

Camp More, Worry Less

A free SVG to start out the week? Yes, please!


This project is what I would call a semi-fail. Not altogether perfect, but also not terrible. Then again, I’m a perfectionist and definitely my harshest critic. But you know what, I love the final product, and that’s all that matters!


Hi I’m Emily, and I absolutely LOVE using the gold glitter vinyl from the Sew Much Cosplay line. It adds the perfect amount of pizzazz to any design. If you’re a glitter gal (or guy), you can use glitter vinyl for the words too! You know what, make the whole thing with glitter if it’s your heart’s desire. You do you, boo-boo! I personally chose Embellish’s black HTV for my lantern and words to make the glitter flame really pop.


This SVG would be so cute on anything in your camp (or glamp, if you’re like me) site! On the back of a camping chair, a blanket to cover up with by the fire, or even on a cooler! I found this wood sign at Walmart for a whopping $5 and thought it would be perfect to hang in the camping trailer.


I have yet to perfect the art of ironing HTV onto wood, but this project is proof that I’m getting better! Honestly, my fault is my patience. Patience is key here, friends.


For this project, I centered my HTV onto the board while my iron was heating up. I used the wool setting with no steam. Make sure that you use a Teflon sheet or a pressing cloth so that you don’t melt the HTV too much. This is where patience comes in. It takes a few good presses all over to get the HTV to really stick to the wood, but once it’s on there it won’t budge.


I pressed my design over the gaps, and then carefully used an Exacto knife to cut the HTV and reveal the spacing in the planks. (Check out the video for a great example on how not to use an Exacto knife!) This was a harder task than I anticipated, so again, patience. Overall, I’m happy with how this project turned out and I think it will look great in the camping trailer!


I love the reminder to worry less! Even while camping and getting away from it all, I still struggle to turn off the worry side of my brain. I definitely need this reminder to just sit back by the fire and enjoy the moment.


Here’s the free SVG!

https://static.wixstatic.com/shapes/5edfbf_c864a07df5754484bf1552d1f2192941.svg


Happy crafting, friends!


Camping Gardening Flag

Camping Gardening Flag

Updated: Aug 14, 2020

There are two way with this lovely project to have fun while camping! Check out this two sided gardening flag Clarrisa made below!

Supplies:

· 2 burlap outdoor garden flags- Make sure they are for outdoors which means they are lined on the back with a plastic coating.

· Standard Sewing thread to coordinate with burlap

· 100/16 chrome denim needle

· Embroidery designs to embroider on front and back– I used Hope Yoder’s “Paperie Whimsy” and Hope’s “Camping Silhouettes”.


This is a link to view the designs in “Paperie Whimsy” https://rnk-embellish.com/products/Hope-Yoder-Embroidery-Designs-and-Patterns/Paperie-Whimsy


Link for viewing “Camping Silhouettes” https://rnk-embellish.com/products/Hope-Yoder-Embroidery-Designs-and-Patterns/Camping-Silhouettes

To purchase these designs you will need to contact your local dealer.


I also used software to add lettering and create the camper applique. Below is a video software lesson on how I created the camper applique from artwork.

· Floriani Embroidery thread for your chosen design.

· Bobbin thread

· Floriani Perfect Stick Stabilizer

· Floriani Heat n Gone Topper –a must for this project!

· Floriani Template tearaway or Embellish Sticky Printable Template Paper-a must for this project!

· Fabric Marker-For this project I used a FRIXION brand marker. I didn’t want to dampen the burlap to remove marks with a water soluble marker. FRIXION is removed with heat.

· Embellish Dimensional Embroidery Foam (optional)

· Small scraps of fabric if you choose to do an applique

· Spray Starch if you choose to do an applique

Prepare Embroidery Design:


1. This is where software is very helpful. Choose a camping design to put on each side of the flag. Enlarge design in your software to fit the flag. I resized my camper applique to 9 ½” wide as my flag was 12” wide. Add a basting stitch around your design in your software if possible. Included is a Video on how I created the camper applique in Floriani Total Control Software.


The backside of the flag- If you choose to use multiple designs, arrange and resize them to fit your flag. My flag was 12×18 so I kept my designs within that size.


I made both sides of my flag different to show you different options. You may choose to make yours the same on both sides or different.


2. Lettering- I once again used a different style of lettering on each side to show you options. On the camper side I chose to use Floriani Total Control with Floriani Lettering Master to download a True Type Font and change it into embroidery. I then used the Circle function in text to curve the font on the top and bottom of the camper. See included Video


On the tent side of the flag I used a Puffy Foam font from Floriani Total Control. If you choose to use Puffy Foam to make your font dimensional you need to choose one of the fonts designated by a PF in the software. These fonts have been digitized specifically for foam as they have the proper stitches at the ends to enable you to tear the foam away.


3. Templates- If you create a design to fit the entire flag it will be too large to stitch out in one hooping. This is where you will need printed templates to assist in lining up each section of the embroidery. For the camper side of the flag, I stitched it in 3 sections; the camper, the upper lettering and the lower lettering. For the tent side I stitched it in 2 sections. The trees/tent/campfire and the lettering/moose. Your design will need to be saved separately in each section.


To print a template, load the section of design on your software screen which you choose to print. I like to print my templates in black and white to save colored ink. I also just print the design itself not the color order. Select your entire design and in the bottom left corner of your screen in Floriani Total Control, select the “thread color search” icon and enter 900 into the find color box. Click Find. Black will be highlighted in the color bar at the bottom with a box around it. Select it and the entire design will turn to black. It will also help conserve paper if you rotate your design 90 degrees.


Load Floriani Template Tearaway or Embellish Sticky Printable Template Paper into your printer.When printing you need to make sure it prints on the rough side of the template paper. In my printer I place the template paper rough side down. If you don’t know what side your printer prints on, make a mark on one sheet of regular printer paper. Load that into your printer with the mark side up and print something on it. See if it printed on the side with the mark or the other side. If it prints on the mark side your printer prints right side up. If not you need to load the paper right side down to print.


Once you have your template paper loaded, click “print preview” the icon that looks like a printer in the top left corner of your screen. Click the “Settings” tab and a dialogue box will open and allow you to decide what you want to print. Here is what I set so it will only print the design and not the color list. Depending on the size of your design it may print multiple pages. Print a template for each section of your design.


Embroidery:

1. Find the vertical center of your flag by folding it in half lengthwise and mark a couple of marks on the fold with the FRIXION marker. Unfold and using your Quilter’s Select ruler, mark the entire vertical center. It may not be the center of the point on the flag if you have a pointed bottom flag.

2. Rough cut each printed template close to the design.

3. Score the shiny paper side of each template and peel off paper exposing the sticky side.

4. Using the marked vertical center arrange each of your templates on the flag. The horizontal center of each design will vary depending on how you arrange your designs.

5. Once you have them arranged, extend the horizontal marking from the template onto the flag.


· If you have an embroidery machine that has a camera and can scan the template, leave one template on. You may choose to put a scanning “snowman” sticker in the center of the template.


· If you don’t have the ability to scan the template, remove all of the templates and connect the previous horizontal marks with your FRIXION marker.


6. Hoop a piece of Floriani Perfect Stick shiny side up. Score the center of the paper and remove the paper to expose the sticky side of the Perfect Stick.


7. With a regular pen or pencil and using the marks on your hoop, mark the vertical and horizontal centers on the Perfect Stick.


8. Place the flag on top of the Perfect Stick lining up the marks on the flag with the marks on the Perfect Stick. You will have to lift the edges of the flag to match the marks on the Perfect Stick.


9. When embroidering an applique you don’t need a topper. If you are embroidering a regular design especially lettering you definitely need a topper especially on burlap. The stitches will fall into the holes in the weave of the burlap and won’t form properly. I used Heat n Gone topper so I won’t have to get the burlap wet to remove it.


10. Attach hoop and if you have the scanning capability scan the “snowman” to make sure things are lined up properly. If not you can check the center.


11. If you didn’t add a baste stitching to your design in your software, set your machine to baste the flag and topper to the Perfect Stick. This is important as the flag will want to pop up from the Perfect Stick.


12. Stitch out your design. If you are doing an applique, I find it very helpful to lightly starch the fabric pieces for my applique before I place them. This keeps the fabric nice and flat while I’m appliqueing it.


13. Remove the majority of the Heat n Gone and the Perfect Stick.


14. Place the tip of a heated iron directly on top of the Heat n Gone to remove the excess Heat n Gone. **Remember to use a low to medium setting on your iron to remove the bits of Heat N Gone from around the design – a high temperature will liquefy the product and make it melt back into the stitching.


15. If you have the ability to scan, replace the next template where you previously placed the marks. Use the “snowman” in the center and scan again when you hoop the next section. Follow steps 6-12 for the next section. Repeat again for any remaining sections.


16. If you don’t have scanning capabilities, follow steps 6-9 and 11,12. Repeat again for any remaining sections.


Suggestions for fun things to do with your embroidery:

· For the lettering on the camper side, I created the font from a TTF I downloaded from Da Font. Here is the link to the website: https://www.dafont.com/ There are hundreds of fonts you can download there. Use them in Floriani Lettering Master to change them to embroidered fonts. It’s also possible in Floriani Total Control Software but easier in Floriani Lettering Master. See the video.


· To the camper applique, instead of an applique for the curtain, I digitized lines and a satin stitch to place and ruffle a piece of lace for the curtain.


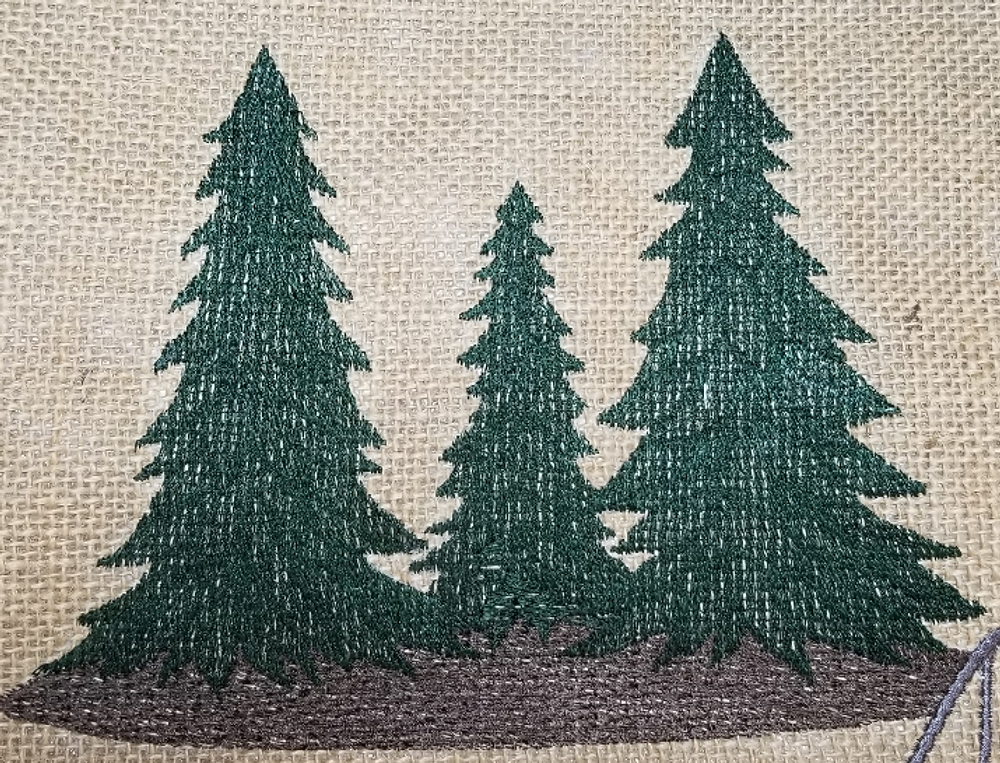
· For the tent side, in Floriani Total Control I decreased the density of the embroidery on the trees and ground. You can see the burlap through the stitching which gives it a rustic look.


Load your design into Floriani Total Control. Select the design. If you don’t see the density setting in the properties box you will need to right click on the design and “convert to outlines”. Select the part of the design you want to adjust and you will see the density setting in the properties box. The larger the number in the density, the less density you have. I set the density setting to .70. Standard density is about .40. Apply.


· For the lettering on the tent side I chose to add Puffy Foam under the stitching. Make sure you select one of the puffy foam fonts designated by a PF in the lettering options of Floriani Total Control. Here is a link on suggestions for using Embellish Dimensional Embroidery Foam:

https://rnk-embellish.com/products/Embellish-Specialty- Products/Embellish- Dimensional-Embroidery-Foam


Stitching the 2 flag sides together:

1. Unstitch the casing on the top of one of the flag sides.


2. Place the 2 flag sides wrong sides together and match the edges. They probably won’t match perfectly so move them around to get the best match. Fold the unstitched casing away from the flag.


3. Thread top and bobbin with thread to coordinate with burlap. Insert a 100/16 denim chrome needle. Lengthen your straight stitch to 4.0.


4. With a ¼” seam allowance, stitch around the 3 sides beginning and ending stitching where the casing stitching is.


5. Fold unstitched casing over the top to the stitched side of the flag.


6. Edge stitch the casing to the flag. Do not reverse to lock your stitching as you may break a needle. Instead, stitch forward about a ½”, lift the pressure foot, pull the casing back to the beginning and stitch forward again over your previous stitching. Repeat again always stitching forward.


Repeat at the end.

Place on your flag stand and enjoy!


Log Carrier

Log Carrier

“A camping we will go, a camping we will go, hi ho the Derry-O. A camping we will go.”

Well, it’s camping week! And we are so jolly about this project, that we are even singing! Clarrisa made this adorable project, and we are obsessed! In fact, we even took it to our own camp fire to see how sturdy this project truly is.. Let me tell you, it’s sturdy!


Follow the video below for a tutorial, or the written instructions below the video

Supplies:

  • 2/3 yard of 60” wide solid fabric-I used canvas

  • 2/3 yard of 60” wide print fabric-I used Home Dec outdoor fabric

  • 100/16 Chrome denim needle

  • Standard Sewing thread to coordinate with fabrics

  • 2 pieces of 15 ¼”x ¾” wood dowel

  • Fabric MarkerEmbellish Heat Transfer Foil(optional)

  • Embellish Vinyl Weeding Tool-This a really cool tool if you do a lot of digital cutting!https://rnk-embellish.com/products/Embellish-Tools/Embellish-Vinyl-Weeding-Tool(optional)

  • Quilting Straight pins-These are longer pins

  • RNK Turning Tool


Cutting:

  • By the way, if you haven’t tried the Quilter’s Select Rulers, Mats and Cutters you’re missingout. They are amazing and make cutting easy! https://quiltersselect.com/products/Select-Tools/

  • From solid fabric cut-Two pieces 10”x 20” and one piece 20”x 38”

  • From print fabric cut-One piece 19 ½”x 20”and eight pieces 4 ½”x 6 ½”

  • Cut two dowel pieces 15 ¼”long

  • Keep in mind that 20” is the measurement for the width of the log carrier.

Digital Cutting: (optional)

1. I love Craft n Cut software for designing files for digital cutting. If you have Craft n Cut I created the lettering using the “Ossington” font, 1.75 inches tall and I used the “wave” in the Path shapes. “Wave” is the last path in the shapes.


2. I then selected the lettering, right clicked and “Breakup Text”. I broke the text into 2 pieces. That way it would fit on my cutting mat. Make 2 sets of lettering.See Video


3. Cut with your digital cutter.

4. With your scissors, rough cut into 4 pieces.

5. Using the Embellish Vinyl Weeding Tool, weed out the extra vinyl.

6. Save Vinyl lettering until the end to fuse to the log carrier.


Construct Handle Holders:


1. Install the 100/16 chrome denim needle and thread top and bobbin with standard sewing thread.

2. Place two 4 ½”x6 ½” pieces right sides together. With a ¼” seam, stitch down the 2 long sides leaving the ends open. Repeat for remaining pieces.

3. Turn right sides out and press flat. To make a crisp edge, roll one layer out past the seam, turn the seam allowance inside to one side and press the seam allowance flat. You may put a little crease in the fabric underneath but you can press that out. See the photo. Fold along the seam allowance and press flat.


4. Edge stitch one long side of each handle holder.

5. Fold one handle holder in half narrow end to narrow end. Edge stitch through all layers of the unstitched side. This will stitch one side closed. Repeat for other 3 holders.


6. Mark ¾” away from the raw edge of each handle holder.

7. Put handle holders aside.

Construction:

1. Using a 3/8” seam, stitch one solid colored 10”x20” piece to printed 20” edge. 20” edge to 20” edge. Repeat for other end of printed piece.

2. Press seam allowances toward printed fabric. Edge stitch along seam on printed fabric with a decorative stitch or a straight stitch. If using a decorative stitch choose a stitch that moves forward easily. The fabric is thick and can get stuck if your stitch is too intense.

3. Place 20”x38” solid piece on top of the print/solid piece you just created. Pin along long sides using quilter’s pins. If you need to, trim edges of solid piece to fit top.

Mark 1 ¼” from raw edge of each long side. See photo.

4. Mark 1 ¼” from raw edge of each long side.See photo.

5. Use a 3/8” seam. Start stitching at the mark, off the edge of the fabric, 3/8” into fabric, backstitch and turn onto 3/8” seam allowance. Pivot at corner and continue stitching to other end and repeat stitching pattern. See photo

6. Clip all corners at a 45 degree angle, turn right sides out and push corners out with the RNK Turning Tool.

7. Press edges flat using the technique in step 3 in “handle holder construction” above. Press under raw open edges of ends 3/8” on both the top and bottom fabric.

Handle Insertion:

1. Slip a handle holder over each end of a dowel.3/4” mark on handle holder should be on top. If it isn’t remark.Repeat for other handle.


2. Slip handle assembly into open end of log carrier to ¾” marking on handle holders. Pin holders into the opening and pin across open end.


3. Edge stitch handle holders and open end closed.

4. Top stitch around entire edge with either a straight stitch or a decorative stitch.


Vinyl Lettering: (optional)

1. Arrange lettering on the solid sections at the top of the log carrier.

2. Press Vinyl to fabric. Let cool and remove top carrier sheet.


Non-Destructible File Folders

Non-Destructible File Folders

It’s the last day for back to school and we are approaching camping week! So why not do a project that you can use for both?! Use these non-destructible folders for school or to hold your camping directions and details!

Supplies

  • Paper File Folder

  • Deco Magic (the measurements of your paper file folder) above sample was 11 ½” H x 19” L

  • Deco Lite 5” x 9” for EACH pocket

  • ½ yard of 45” wide fabric (need extra to match stripes or patterns)

  • Thread to match fabric

  • Wonder Clips (or paper clips, or clothes pins)

  • Rotary Cutter, Ruler, Mat

  • Sewing Machine

  • Iron

Instructions

Fuse fabric to Deco Magic, trim fabric leaving 1” all around the edges


Fuse fabric to Deco Magic Lite, trim fabric leaving top edge 1” and 1” on short side (on 1 right side and on 1 left side)


Press fabric even to the edge of the Deco Magic and the Deco Magic Lite and hold in place with Wonder Clips.


Edge Stitch sides of pockets with matching thread


Place pockets on the inside of folder with raw edges even, fold over fabric on all 4 sides of folder. Hold in place with wonder clips. Edge stitch folded edge. Fold file folder in half, press and you are done!

Pencil Pouch

Pencil Pouch

We are wrapping up Back to School week and we are so excited to share this project by Clarrisa! Follow the instructions below!

Supplies:

  • 1/3 Yard of main fabric (if you choose to embroider or ¼ yard if your aren’t embroidering)

  • Scraps of fabric if you choose to do an applique

  • 2 pieces RNK Sew Fab Foam 5 ½”x11 ½”

  • 12” Zipper

  • Standard Sewing thread to coordinate with main fabric

  • Floriani Embroidery Thread if you choose to embroider

  • Quilter’s Select Glue Stick

  • RNK Turning tool

  • 2 pieces Floriani Heat n Sta 10”x13” if you choose to embroider

Cutting:

  • Two pieces of main fabric 10”x13” if you choose to embroider front and back

  • Two pieces of main fabric 5 ½”x11 ½” if you’re not embroidering

Embroidery: (optional)


1. Fuse one Heat n Sta 10”x13” piece to back of one piece of the main fabric and hoop in

5”x7” hoop (130x180mm)

2. Prepare your embroidery design. I used a free design from Floriani Total Control, April

2018 and added lettering using the “Child’s Play” font spelling out “Writing Tools”. On

the back I used the same font and put the child’s name.

3. Following color changes and applique technique, stitch out design.

4. BEFORE YOU REMOVE FROM HOOP, using the marks on your hoop, mark with small

marks the vertical and horizontal centers on the main fabric. Remove from hoop.

5. Remove Heat n Sta.

6. Press from the back side. If you press from the front use a pressing cloth.

7. Using the vertical and horizontal marks on the main fabric, cut piece to measure 5 ½”x11

½”. Measure 2 ¾” on both sides of the vertical center to know where to cut. Likewise,

measure 5 ¾” on both sides of the horizontal center to know where to cut.

8. Repeat above process if you choose to embroider on the back of the case.


Construction:


1. Fuse RNK Sew Fab Foam to backs of both main fabric 5 ½”x11 ½” pieces. Press from the

fabric side.

2. Using either your sewing machine or serger, edge finish one long edge of each 5 ½”x11

½” piece.

3. Using your Quilter’s Select Glue stick, place glue on one side of the zipper tape. Glue right

sides together (zipper teeth down), ¼” down from long edge of one main piece. The

zipper start will be at the left and the excess zipper will be on the right. See photo

4. Using your zipper foot, stitch zipper to top edge of main piece close to zipper teeth. You

will need to move your needle to the far left.

5. Turn zipper away from main piece. Move zipper foot and needle to opposite side. Edge

stitch along folded edge catching zipper tape edge below. Stitch again ¼” away from

edge stitching this time catching the seam allowance below. See photo

6. Repeat steps 3-5 for opposite side of zipper and remaining main piece. This time you will

be stitching from the excess end of zipper toward zipper pull end.

7. UN-ZIP ZIPPER ABOUT HALF WAY.

8. Folding pieces in half along zipper, place main pieces right sides together and pin.

9. Using a ½” seam allowance, stitch around the 3 raw edges. Stitch over zipper at both ends

back stitching at both ends. See photo below

10. Trim excess zipper end to about 1”.

11. Edge finish 3 raw edges.

12. Clip both corners at a 45 degree angle.

13. Turn right sides out and push corners out with your RNK turning tool.


Cushy Laptop Sleeve

Cushy Laptop Sleeve

Clarrisa made another back to school project, and this one may be our favorite! Follow her instructions below to make your own laptop case!

Every laptop is a different size. I will be giving you instructions to measure and create a laptop sleeve for your laptop.


Supplies:

  • Fabric- Generally a ½ yard or less will be sufficient for most laptops. Instructions are below for exact measurement. I used a heavier 45” fabric. Denim or a home decorating fabric would also work well.

  • Sport or Purse zipper- Length will depend on your laptop. Measure the width of your laptop and add 2”. Purchase the closest size with longer being better than shorter.

  • 2 pieces of RNK Sew Fab Foam or Cosplay Super Structure Foam – The size will depend on the size of your laptop. You will cut these pieces the same size as the outside fabric which instructions are below.

  • Standard sewing thread to coordinate with outside fabric.

  • 100/16 chrome denim needle

  • Quilter’s Select Glue Stick

  • Quilter’s Select 6”x24” ruler (if not embroidering)

  • Fabric Marker

  • Quilter’s Pins (usually longer pins)

  • Zipper Foot for your machine

  • Quilting Embroidery Design (optional)

  • Floriani Wet n Stick Stabilizer (optional)

  • Floriani Embroidery thread to coordinate with your fabric (optional)

  • Embroidery Bobbin thread (optional)

Measuring:

1. Measure all the way around the width and length of your laptop. Take a tape measure and

starting somewhere on the top, go all the way around the sides, back and then back to the

top where you began. Do this for both directions of your laptop.

2. Use those measurements, divide in half as we will be making this in 2 pieces and add 2” to

each measurement for seam allowances and a little extra room. My laptop width measured

32” all the way around, divide by 2=16”, add 2”=18”. My laptop height measured 21 ½”

all the way around, divide by 2=10 ¾, add 2”=12 ¾”. DON’T CUT YET. See next step.

See above chart for decimal and inch equivalencies for fabric measurement.

3. We will be quilting the front and back of the sleeve by either embroidering or straight line

quilting. This tends to “draw up” the fabric and Sew Fab Foam so you may lose some of

the width and height of your measurements. As a result we need to cut the fabric and Sew

Fab Foam a little larger and trim to right size when we are done quilting. To the width and

height you need to add 1 ½”. My width measurement ended up being 18” from the

measurement in step 2, add 2”=20”. My height measurement was 12 ¾” from above, add

2”=14 ¾”. I would cut my fabric and Sew Fab Foam, 14 ¾”x20”.

Cutting and Prepare fabric:

1. Cut 2 pieces of your outside fabric the measurements calculated above.

2. Cut 2 pieces of RNK Sew Fab Foam or Cosplay Super Structure Foam the size of the

measurement calculated above.

3. Fuse RNK Sew Fab Foam or Cosplay Super Structure Foam to the back of your Fabric.

Fuse from the fabric side.


Embroidery: (optional)

1. Choose a “quilting” embroidery design. You will use your design to quilt the entire front

and back so it needs to be as big as you can embroider it.

2. In your software, enlarge your design to fit your largest hoop.

3. In Floriani Total Control Software I also took the running stitch that made up my design

and changed the running stitch in the design to a “bean” stitch. A bean stitch repeats

each stitch in odd numbered multiples. Once you have the run stitch in your design

selected, select the “commands” tab in the running stitch property box. It is the tab that

has the running stitch with a plus next to it.


Use the drop down arrow next to “bean style” and select “bean”.Change the repeats to 5 and click “Apply”. Each stitch will now be repeated 5 times. This way you can see the stitching better on a print fabric. Make sure to save your design.


4. I also found it very helpful to baste the fabric/Sew Fab Foam to the stabilizer when I

embroider. Even though the Wet n Stick is very sticky, the Sew Fab Foam wants to lift away

from the stabilizer especially around the edges of the hoop. You can either baste using the

function of your machine or you can add a baste stitch in your software.

It’s very easy in Floriani Total Control to add a baste stitch.


· Select the “Program Preferences” icon on the top tool bar.

· Select the “Auto Baste” tab. Make any adjustments you want to your baste stitch. You can

choose to add cross hairs to mark centers, adjust the stitch length and adjust how far away

from your design you want to baste. If you have resized your design to fit your hoop you

would set the “baste past outer edge of design” to zero.

· Go to “tools” in the upper left corner and select “Auto Baste”. A basting stitch will

automatically be added around your design with your settings made in program

preferences.


5. On the side with the Sew Fab Foam or Cosplay Super Structure Foam, mark a vertical and

horizontal center on both of your fabric/Sew Fab Foam pieces. (backside)

6. Hoop a piece of Floriani Wet n Stick stabilizer glue side up. The glue side is the rough

side. Dampen the glue with a little water and spread the water around until the surface

becomes sticky. Don’t use too much water or it won’t stick.

7. Fold one fabric/Sew Fab Foam piece on either the marked vertical or horizontal line on

the back and hold over the Wet n Stick. Using the marks on your hoop and the marks on

the back of your fabric/Sew Fab Foam piece, match the vertical and horizontal centers and

stick your piece down. It doesn’t have to be perfect as you have a little wiggle room

because you cut your piece a little larger.

8. Baste the fabric/Sew Fab Foam piece to the stabilizer and embroider your design.

9. Measure the width and length of the box created by basting and mark the centers each

direction. The width on my basting measured 14” so 7” would be the center. Remove

from hoop.

10. Trim all thread tails and jump stitches on the back. Dampen the back to loosen the glue of the Wet n Stick and tear away the Wet n Stick.

11. Repeat for other fabric/Sew fab Foam piece.

Straight Line Quilting: (if you aren’t embroidering)

1. Place the Quilter’s Select ruler 45 degree angle marking on one straight edge of one of the fabric/Sew Fab Foam pieces.


1. Using your fabric marker, mark a line at the 45 degree angle on your piece.

2. Move the ruler 2” away and mark again. Continue making marks 2” apart on the entire

piece.

3. Turn the ruler and fabric/Sew Fab Foam piece and mark a 45 degree angle in the opposite

direction. Continue making marks 2” apart going the opposite direction on the entire

piece.

4. Using a Standard Sewing thread, stitch on marked lines.

5. Repeat for other fabric/Sew Fab Foam piece.


Cut Fabric/Sew Fab Foam pieces to size:

1. Fold each fabric/Sew Fab Foam piece in half horizontally and vertically and mark centers

with small marks. Mark at both ends of the horizontal and vertical centers.

2. Measure to the left or right of the vertical center marks, half the distance of your finished

width measurement. My width measurement is 18” (Step 2 in the measurement section

above) finished so I would measure 9” from the center and cut. Measure over 9” the other

direction and cut again. You have an 18” wide piece. Repeat for the other direction.

3. Use a round object as a template to cut the curves on all 4 corners. I used a cone spool.

Find something round to trace that isn’t too large. Place the round object in a corner, trace

the curve and cut out the curve. Repeat for all corners on both pieces.


Zipper:

1. Fold zipper in half matching the top and

bottom zipper stops. Mark the center

on both zipper tapes.

2. Using your Quilter’s Select Glue Stick,

run a line of glue on one half of the top

edge of one of the fabric/Sew Fab

Foam pieces. Matching the marked

centers of the zipper and fabric/Sew

Fab Foam piece, glue one half of the

zipper to the top edge, right sides

together.

3. To glue the zipper around the curved

end of the fabric/Sew Fab Foam piece

you will need to clip the zipper tape

about ¼” deep at the curve about every

½”. Don’t clip too deep!


Glue zipper around curve. Repeat and glue other half of the zipper to the top edge.

4. Attach the zipper foot to your machine in the right position. Place the needle in the far left position.


5. Thread your machine with the Standard

Sewing Thread and insert a 100/16

denim chrome needle.

6. Stitch your zipper to the top edge of

the fabric/Sew Fab Foam piece. The

edge of your zipper foot will be right

next to the zipper teeth. Begin and end stitching at the zipper stops. Leave the zipper

tape at the beginning and ending unstitched. If the zipper pull gets in the way, move it

away from where you are stitching.

7. Select a zig zag and widen to the widest setting. Edge finish where you stitched the zipper.

8. Clip “V” shaped clips around the curve where you clipped previously.


9. Move zipper foot to the left position and the needle to the far right position. If your machine has a “needle down” setting, set your needle to stop in the down position.

10. Turn zipper away from the fabric/Sew Fab Foam piece and fold the seam allowance toward the fabric/Sew Fab Foam piece. Edge stitch where the fabric/Sew Fab Foam is folded.


Take your time around the corners. Take a few stitches and then push the fabric/Sew Fab Foam away from zipper and stitch again.

11. Repeat steps 2-10 for the other side of the zipper. This side may be a little trickier as you

have the first piece attached. Take your time. You will work with the first piece with the

zipper attached, on top, right side down and the unstitched piece on the bottom right

side up.


Construction:

1. UNZIP ZIPPER about half way.

2. Place both fabric/Sew Fab Foam pieces right sides together. Line up edges and pin

together using the long Quilting pins.

3. Attach a standard stitching foot. Using a ½” seam allowance, begin stitching at the center

bottom. Stitch around the corner toward the zipper stop. Turn excess zipper tape at zipper

stop away from the fabric/Sew Fab Foam pieces and stitch as close as possible to where

the zipper was originally stitched in. Backstitch. Your stitching will end about ¼” away from

the original zipper stitching. Repeat for other side.

4. Using a wide zig zag, edge stitch around entire raw edge.

5. Clip “V” shapes in bottom 2 corners.

6. Turn right sides out through the open zipper.

7. Press stitched edges flat.

Notebook Cover

Notebook Cover

It’s back to school week part 2, and we are in LOVE with this new project! Have you ever thought about up-scaling your notebook or binder?! Clarrisa made this amazing project, just for you!

Below are instructions for a cover for a standard 3 ring binder with a 1 ½” depth. I have also given you instructions on how to measure for any book or notebook.


Supplies: For a standard 3 ring binder, 1 ½” depth. Below you find instructions for calculating fabric for another book or notebook.

3/8 yard of fabric for outer cover

3/8 yard of fabric for lining

Piece of Floriani Heat n Sta Fleece 12 3/4”x23”

2 1/8 yards of premade piping or 2 1/8 yards of cord to make your own piping. You will also need 2 1/8 yards of extra wide double fold bias tape if you are going to make your own piping. It’s also really helpful to use a tool to cut the seam allowance of the piping. (Optional)


Here is a link to purchase one: https://shop.farmhousefabrics.com/stores_app/Browse_Item_Details_side2.asp?Shopper_id=7167911154716&Store_id=198&page_id=23&Item_ID=17700&Name=Groovin%92-Piping-Trimming-Tool—Grande,-For-Cordin


Standard Sewing thread to coordinate with the piping color and the cover fabric.

RNK Turning Tool

If you choose to embroider-

· An embroidery design of your choice. I created the design on my cover in Floriani Total Control Software

· Floriani Wet n Stick to fit your hoop

· A piece of Floriani Tear Away to float under your hoop if your design is more than 10,000 stitches

· A piece of Floriani Heat n Gone topper to cover design

· A piece of Floriani Now Show Fusible Mesh slightly larger than your design

· Floriani Embroidery thread for your design

· Quilters Select Self Erase Marker

Measure your Binder, Book or Notebook:

1. Measure the cover of the item you want to cover. Measure from the back edge of the cover, across the spine and to the edge of the front cover.

2. My binder measures 21 ½”. Add 1 ½” and cut the width 23”. This allows for seam allowances and a little give when the binder closes.


3. For the height, of course measure the height of the item you want to cover and add 1 ¼”.My binder measures 11 ½” Add 1 ¼” and cut the height 12¾”


4. The Heat n Sta Fusible fleece lines the cover so I will cut the cover fabric and the fleece 23”x12 3/4”. That means I need to purchase about 13” of fabric and fleece which is closest to 3/8 of a yard.

3. Do your own calculations and figure the measurements for the item you want to cover. Make sure to add 1 ½”to the width and 1 ¼” to the height.

4. To calculate how much piping you will need, use the total measurements of the 4 sides of the cover fabric.

5. The measurements for my binder cover fabric are 71 ½” total around all 4 sides so I need about 1.98 yards. I would round up and get 2 1/8 yards to allow for turning corners and the extra for the beginning and ending of the piping. Measure around your cover fabric and calculate how much piping you will need.

6. We’ll calculate lining measurements after we embroider and prepare the cover.


Embroidery: (optional)

1. The embroidery design on my binder cover was created in Floriani Total Control Software. There is a whole software lesson here but basically I took a photo of one of the foxes on my lining fabric with my cell phone and imported it to my computer. I used the “Load Backdrop” tool to import the design into the work space in my Total Control software. I used that as a template to digitize on top of. I opened the “digitizing tools” icon and then selected the “complex fill stitch” icon. (the center icon) Choose the area you want to digitize, left click around it and right click 3 times and area will be filled. Sounds easy enough but you will need to practice a bit. Practice by drawing shapes on your screen by using the “Input Rectangle” tool. Click the arrow next to the tool and you can see options for drawing shapes on your screen. Have fun with it! Totally doable in Floriani Total Control!


2. You need to decide where you want to place your embroidery design. I placed mine on the edge of the front. You may also of course place it in the center of the front cover.


3. If you choose to place your design on the edge of the front cover, for the vertical center of the design area it is helpful to print a template from your software and use it to determine where you would like your design. It also depends on the size of your design. Keep in mind that you have to leave a 3/8” seam allowance on the front edge. I placed my design 3” from the raw edge of the front edge. You can find the horizontal center by folding the front cover in half widthwise and mark the center.


If you choose to place the design in the center of the front cover, you will need to take some measurements to determine the vertical center.


· Find the vertical center of the cover fabric. (where the spine of the binder would be) Fold cover fabric piece in half lengthwise. Mark the center.


· Measure the width of the spine. My binder has a 1 ½” spine. Divide that by 2 and add 1/8”. That would be 7/8” for my binder. This is where the binder would fold. Mark to the right of the previously marked back center mark 7/8”. I also marked to the left of the center just to illustrate where the spine would be. You don’t need to mark that. See photo


· Mark 3/8” from the front edge of the binder cover fabric. This is the seam allowance.


· Measure from the 7/8” mark to the seam allowance mark of the front edge of the binder. Mine measured 10 3/8”. Divide that by 2 to find the vertical center. I marked the vertical center at a little less than 5 ¼”.

10 3/8 doesn’t divide evenly so that’s why I marked a little less than 5 ¼”


· You can find the horizontal center by folding the front cover in half widthwise and mark the center.


4. Fuse a piece of Floriani No Show Mesh to the back of the area you will be embroidering.

5. Hoop a piece of Floriani Wet n Stick stabilizer. With a pencil, mark on the Wet n Stick stabilizer the vertical and horizontal centers using the marks on your hoop.

6. Slightly dampen the Wet n Stick and spread the water around until the stabilizer becomes sticky.

7. Using the marks on your cover fabric piece and the marks you made on the Wet n Stick, line up and stick the cover fabric piece to the Wet n Stick.

8. Slide a piece of tearaway below the hoop and place a piece of Floriani Heat n Gone on top of the hoop area.

9. Stitch out your embroidery design.

10. Tear away the Heat n Gone topper, the tearaway and the Wet n Stick. If the Wet n Stick is really stuck, just dampen the area again and it will tear off easily. Cut away excess the No Show Mesh.

11. Press the embroidered area from the back. Turnover and using the tip of your iron, remove the Heat n Gone Topper.

12. Press the Floriani Fusible Fleece to the back of the cover fabric.


Piping:

1. Attach a piping or zipper foot to your machine. Place the foot in the right position and the needle in a little less than left position. I moved my needle to somewhere between center and left position. This way the piping construction thread won’t show when you stitch the piping to the cover. Set your machine for a straight stitch and lengthen the stitch to a 4.

2. Thread your machine with sewing thread to coordinate with your piping.

· To make your own piping:

a. Bias Tape comes in a lot more colors than pre-made piping. I usually can find a color that coordinates with my project. This saves me from having to cut my own bias. Of course you can cut your own bias as well.

b. Open and press the Extra Wide Bias Tape flat. To get the creases out use a water bottle, dampen the bias tape and press out the water.

c. Place cording down the center of the bias tape and fold the bias tape over the cording matching raw edges of bias tape.

d. Place cording under pressure foot with cording on the left and raw edge of bias on the right.

e. Stitch along bias tape. The stitching will be a little to the right of the cording.


a. Using a piping cutter tool, (optional) cut the bias tape to a 3/8” seam allowance. If you like to make piping this tool is a must. The tool has a groove that the piping goes in to keep it in place while you’re cutting. The tool I have is no longer made but the link above in the supplies list will take you to where you can buy a tool that works as well. If you don’t have the tool cut the seam allowance with your scissors.


1. Leaving a 1” tail, begin stitching the piping at the center of the wide side of one of the long edges of the cover. At the corners, stop stitching the width of the flange on your piping from the corner and tie off your stitching. The flange on my piping is 3/8” and so I stop stitching 3/8” from the corner. See photo


Clip the flange of the piping at a 45 degree angle into the piping at the corner.Turn the piping around the corner and continue stitching.


5. To finish the end, turn the beginning tail away from the cover at a 45 degree angle. Turn the end of the piping away from the cover at a 45 degree angle as well and lay next to the beginning of the piping. Continue stitching about a ½” over the beginning of the piping through the cording. Trim tails to about a ½”.


Lining:

1. The cover fabric for this project was cut at 23”x12 ¾”.

2. Using the width measurement of the cover, divide it by 3. My binder cover fabric measures 23” divided by 3 which is 7.66. That’s a little tough to measure so we are going to round up to 8”. The lining is 3 separate sections. The end sections are the pockets for the front and back cover of the binder and the center section goes around the middle of the binder.

3. The height of the binder cover fabric is 12 ¾” for my binder. That will be the height we will cut for the lining.

4. On both pockets ends of the lining you will need to hem one long edge. Using a ¼” double fold hem for one edge, and adding a 3/8” seam allowance for the front edge, you will need to add 7/8” to the width of each of these pieces. For my binder we calculated a width of 8” above (step 2), add 7/8” and we will cut our pocket lining sections 8 7/8””x12 ¾”. Cut one for each pocket end.

5. The center section needs to be hemmed on both sides. With our 8” width calculation above and a ¼” double fold hem on each side we will add 1” once again to our width calculation. Cut the center lining piece 9”x12 ¾”.

6. Turn one long edge of each pocket end piece under about ¼” twice and stitch. Do the same for both sides of the center section.

7. Place the right sides of the lining sections on the right side of the cover. Center the center section of the lining on the previously marked center line of the cover and pin. Place the hemmed side of both pocket lining pieces next to the hemmed edges of the lining center section and pin. The pocket ends of the lining may be a little wide as we rounded up in our measurement in step 2 above.


8. Turn to the cover fabric side and trim excess pocket end lining.


9. Thread your machine with Standard Sewing thread that coordinates with the cover fabric.

10. Attach piping or zipper foot to your machine, in the right position and the needle in the far left position. Stitch from the lining fabric side. Stitch around the entire outside edge of the lining side. Stitch as close as you can to the piping.

11. Zig-zag around outside edge to finish the seam allowance. You will need to use the widest zig zag stitch you have as the pressure foot will want to push the seam allowance away from the stitching area because of the piping.

12. Clip all 4 corners at a 45 degree angle.

13. Turn the lining pieces and cover right sides out and push the corners out with the RNK Turning Tool.

14. Press around all edges.

Slip front and back covers of your binder into the end pocket pieces.


15 Minute Mouse Pad

15 Minute Mouse Pad

Well, we all know that school is starting back! Whether you are doing online schooling at the comfort of your home, or you have a child going off to college, this is the perfect project for you!

The edges of this mouse pad can be finished using either your sewing machine or your serger. This will determine what thread you will use for edges. You can also choose to do a rectangular shape or circle mouse pad. Clarrisa will give you step-by-step instructions below!


Supplies:

· ¼ yard of cotton fabric

· 17”x width of fusible Stitch n Shape

· Thread to finish edges-

– For serger-One cone of decorative serger thread-I used wooly nylon. Two cones of

standard serger thread.

– For sewing machine-One spool of either standard sewing thread or one spool of Floriani

Embroidery thread

· Quilter’s Select Glue stick

· If using a sewing machine to finish edges-Two 11”x 11” pieces of Floriani Heat n Sta

stabilizer

· If using a sewing machine to finish edges- an applique stitching foot for your machine

· 90/14 Denim or Microtex Chrome needle

· Fray Block


Cutting:

For rectangular pad cut two pieces of Stitch n Shape 8”x 9 ½”. Cut one piece of fabric 8”x 9 ½”.


For circular pad find something to use as a template to trace a circle. I found a bowl in the kitchen or you can use a container, a lid or whatever you find that is about 8”-9” in diameter. Trace two circles onto the Stitch n Shape and cut out. Cut one piece of fabric the same size.


Prepare Stitch n Shape:

1. Using your Quilter’s Select glue stick, run a line of glue around the outside edge of one

piece of the Stitch n Shape on the non-fusible side.

2. With the fusible side down, place the other piece of Stitch n Shape on top of the glue

lining up the edges. The pieces should be non-fusible to fusible sides.

3. Fuse fabric to fusible side of Stitch n Shape piece.

If using a sewing machine to finish edges-fuse two pieces, one on top of the other, of

Floriani Heat n Sta to back of the fabric/Heat n Sta piece.Use a Teflon pressing sheet on

the ironing surface when fusing to keep fusible from sticking to ironing surface where

exposed.


Outside edge stitching:

For sewing machine,

1. Wind a bobbin and thread your machine with either the standard sewing thread or the

embroidery thread.

2. Attach Applique stitching foot to your machine and a 90/14 Denim or Microtex Chrome

needle.

3. If your machine has built in applique stitches, select a wide satin applique stitch. If your

machine does not have a built in satin stitch, select a wide zig-zag and decrease the stitch

length to about a 1. The stitches need to be close together.

4. Experiment- Using scraps of the Heat n Sta and your fabric, make a small piece of the

Heat n Sta/fabric/stabilizer “sandwich” using the above steps. Place edge of the

“sandwich” under the pressure foot with the right side of the stitch stitching off the edge.

Using a medium speed, stitch around the entire edge of your sample piece adjusting if

necessary. If your stitching is too sparse you may need to decrease your stitch length and

conversely if the stitching is too dense and not moving forward you will need to lengthen

your stitch. Keep in mind that you can’t put any pull on the “sandwich” while you’re

stitching and you may have to give it a little push to keep it moving along. When turning

corners, stitch off the end, turn and back up stitching to beginning of corner stitching over

the end of previous stitching.

5. Using settings from above experiment, stitch around the edges of either your rectangle

piece or your circle.

6. Use a drop of Fray block on all corners and ends.

For Serger,

1. Set your serger for a 3 thread wide overlock.

2. Place your decorative serger thread in the upper looper and standard serger thread in the

left needle and lower looper.

3. Adjust your stitch length to about a 1. You may have to adjust this depending on your

thread. Once again you may want to experiment.

4. Stitch around entire edge of either your circle or rectangle. Using a blunt needle, thread

tail end threads back through previous stitching.

5. Use a drop of Fray Block on all corners and ends.