Trick or Treat BOO BAG

Gather together….
For the Front (the side with 3 panels)
For each of the panels you will need the following:
-
A piece of Power Mesh to fit your hoop
-
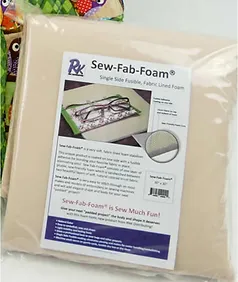
A piece of RNK Sew Fab Foam 7”x15”
-
A piece of fabric 7”x15” fused to each piece of foam. The center panel is a contrast color.
-
Fun Threads! Embellish Matte thread, Floriani Glow in the Dark Thread, Floriani or Embellish Metallic thread
Panel 1 (ghost)-
EMBROIDERY DESIGN-We will be using one of the small ghosts from the “Boo Triple Treat Panels” by Pickle Pie for this panel. To fit our project you will need to resize the design to 5.25” x 7.87”. You will also need to delete the last 2 color stops as we are not creating a banner. If you currently don’t have software please download the Free Floriani Creative Express Software to resize your design.
https://rnksoftware.club/explore-fce.php
-
A piece of fabric 4 ½” x 6 ½” for the ghost applique. Fuse a piece of Embellish Repositionable Web to the back.
-
A piece of fabric 1 ½” x 1 ½” for the bow if you are stitching the girl ghost.
Panel 2 (lettering)-
EMBROIDERY DESIGN-You can customize this panel to add lettering or use the included download panel that has ghosts down the center. If you are customizing this panel, the Zig Zag quilting Embroidery design behind the lettering is included as a download for this project.
-
½ yard of medium sized ric rac to embellish sides of panel
Panel 3 (Boo lettering)-
EMBROIDERY DESIGN-We will be using the small lettering design from the “Boo Triple Treat Panel”. It needs to be resized to 5.25” x 7.87”.
For the Back (the side with the Candy Corn Banner)
Background-
The Ghost Quilting design for the background and the Happy Halloween wording are included as a download for this project. They are on the createwithrnk.com/blog Please download them.
-
A piece of either Floriani Cutaway Medium or Floriani Power Mesh to fit your hoop-the design for the background is 200mm x 360mm. If you don’t have a hoop of this size, options will be listed below.
-
A piece of RNK Sew Fab Foam 15”x15”
-
A piece of Fabric for the back, 15”x15”
-
Thread options -Embellish Matte thread, Floriani Glow in the Dark Thread for the lettering
Candy Corn Banner-
We will be using the Pickle Pie, Candy Corn Banners design. To fit our bag the design has been resized to 3.5” x 3.89”. Please use your software to resize the design. If you currently don’t have software please download the Free Floriani Creative Express Software to resize your design.
https://rnksoftware.club/explore-fce.php
-
A piece of Floriani Cutaway Medium to fit your hoop-the design will fit a 100mm x 100mm hoop. If you choose, you may use your software to place 3 in one hooping.
-
3 pieces of RNK Embroidery Batting, 4 ½” x 4 ½” each
-
A ribbon or trim for the banner, ¼” wide x 18” long
-
6 pieces of ¼” wide ribbon, 2” each- this is on the back of each Candy Corn to insert the ribbon/trim to hang them
-
3 pieces of fabric of 3 colors for each Candy Corn. Cut 3 pieces of each color for all 3 Candy Corns. As we have resized the design, disregard the dimensions suggested in the instructions included with the design.
-Orange—2 ¼” x 4”
-Yellow—-1 ¾” x 3 ¼”
-White—-1 ¾” x 2 ¼”
-
3 pieces of fabric for the back of each Candy Corn, 4 ½” x 4 ½” each
-
Thread options-Embellish Matte Thread, Floriani Glow in the Dark Thread
-
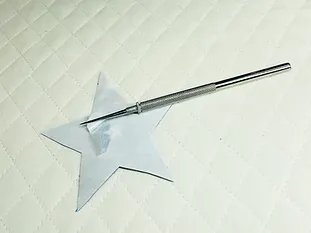
RNK Turning Tool
Pieced Band at the top and bottom of the bag-
-
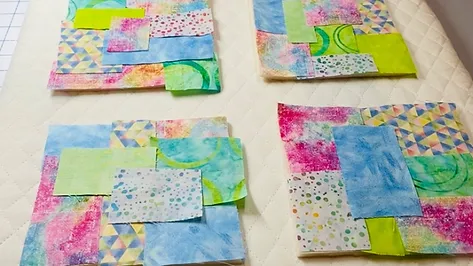
12 Squares of fabric 2 ¾” x 2 ¾”.
-
3/4 yard of large Ric Rac or trim (optional)
Lining-
-
A piece of fabric 12”x 26 ½”
-
A 10” square of fabric to cut bottom piece
-
A 10” square of fusible Cutaway fused to the fabric
Bag Bottom-
-
A piece of RNK foam and fabric, 10” square. Fuse fabric to foam.
-
2 pieces of either RNK Deco Magic or Floriani Stitch and Shape, 9”x9” to stiffen the bottom of the bag.
Handle-
-
Cut a piece of RNK Deco Magic or Stitch n Shape, 1 ½” x 20”.
-
Cut a piece of fabric, 3 1/8” x 20”.
-
A piece of ½”-1” wide ribbon or bias tape 20” long.
Additional Tools-
-
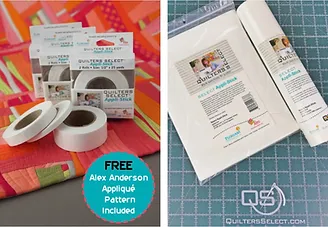
RNK Stitch Perfection Tape
-
Chalk Marker if you are using dark fabric
-
Quilter’s Select ruler and Cutter for marking and cutting.
-
100/16 denim needle
-
Quilter’s Select Glue Stick
-
Quilter’s Select Quilting Clips
-
Wooden Clapper for pressing
Embroider-
BACK
Candy Corn Banner
1. Begin by embroidering 3 candy corn designs. Use Floriani Cutaway in the hoop and embroidery batting. Follow the written instructions included with the design for the embroidery process. Make sure to resize the design to the above dimension.
2. Use the RNK Turning tool to help turn each candy corn.
3. Thread the ribbon through the back of each candy corn to create the banner. Set aside.
Background- 15”x15” piece
If you do not have a hoop large enough to stitch the entire background, you will need to machine quilt the center of the 15”x15” piece. You can just quilt lines 1” apart from each other. You will need to quilt an 8”x14” area in the center. Once that is quilted you can than embroider the Happy Halloween lettering 1” from the top of the quilting.
4. Hoop a piece of Floriani Power mesh.
5. Stitch color stop #1 directly on the stabilizer.
6. Place Strips of RNK Stitch Perfection tape within the embroidered rectangle.
7. Center one piece of the 7”x15” fabric/foam over the rectangle and stick to the tape. It helps to fold the piece in half with the back showing and use that as the center. There is excess fabric so no worry
8. Stitch color Stop #2 which will stitch the fabric/foam to the stabilizer.
9. Continue stitching through the design. Remember to use fun thread when stitching the lettering.
10. The final color stop are placement marks for placing the banner. You may want to stitch with a color that matches your ribbon.

11. Remove from the hoop and trim away excess Power Mesh.
12. Use your Quilter’s Select ruler and cutter to trim along the short edges of color stop #2. Trim the entire 15” edge. Your piece should measure 14” wide by 15” high.
13. Using a chalk marker, mark along both long edges of color stop #2 and then ½” outside that mark. (top and bottom of the panel) These are for placing the ric rac and pieced band.
14. Using the Quilter’s Select Glue stick, glue the Candy Corn Banner at the embroidered marks.

15. Use your button sew- on stitch or a zig zag with no length to tack the banner to the background.
FRONT

· For each of the 3 panels you will hoop Power mesh and use the 7”x15” fabric/foam pieces.
· Remember to resize the panels according to the instructions in the supply list above and delete the last 2 color stops as this will not be used as a freestanding panel.
· Use the process in steps 5-8 above to attach the fabric/foam piece to the stabilizer at the beginning of the embroidery process and then stitch the Ghost and Boo Wording panel following the process in the original instructions.
· Customize your center panel with a name of your choice or use the panel with the ghosts down the center which is a part of downloads for this project.
· After embroidering each panel, trim the long edges along the long sides of color stop #2. Each panel should finish at 5 ¼” X 15” after trimmed.
Construction-
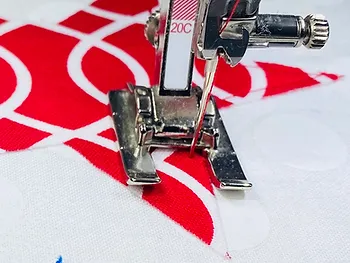
1. Use a pressure foot that has a channel on the bottom for the thicker fabric to go through. Lengthen your stitch to 3mm.
2. Use the Quilter’s Select Quilting Clips, clip the edges and join the front 3 panels with a 3/8” seam allowance.
3. Press the seams open using steam and use the wooden clapper to press the seams flat.
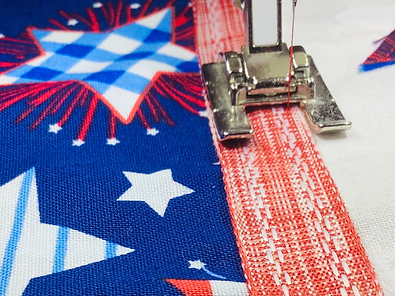
4. Using the Quilter’s Select Glue Stick, run a line of glue along the seams of the center panel and glue the medium sized ric rac along the seams. Zig Zag along the entire seam which will keep the seam open and also attach the ric rac.
5. Follow steps 11-13 in the BACK section above to mark the pieced front.
6. Stitch one edge of the front and back together using a ¼” seam allowance. Use the clapper again to open the seam.

7. Glue the inner curve of the ric rac trim to the inner marked line on both the top and bottom.
Bottom edge
8. Upper and Lower bands-
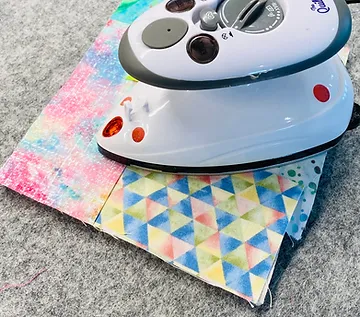
· Stitch together all 12 squares with a ¼” seam. Press the seams open and use a little starch to keep them open.
· Adjust your stitch length to 5mm and your upper tension to 7 . Use a pressure foot with a channel on the bottom. Stitch 3/8” from the edge of each band. This will pull in the edge slightly and keep it from stretching with stitching.

· With right side down, place the edge of the pieced band along the outer marked line.
Pin or glue in place.

Bottom Band
· Stitch with a ½” seam allowance.
· Turn bands away from center and press flat using the clapper.
· Pin or glue the unstitched edge to the bag and baste with a 3/8” seam

9. Trim excess fabric/foam above the band at the top and bottom. The finished piece should be 12” tall.
10. Align remaining side edges, right sides together. Clip together using the Quilting Clips and stitch with a ¼” seam allowance. Press open using the clapper.
11. Prepare bottom pieces-
· Print both circle patterns. One is for the bottom of the bag(larger) and the other is for the bottom insert(smaller). The circles are split in half so you will need to print 2 of each. Cut along the center and tape the halves together.
· Use double sticky tape and tape the larger circle to the fabric/foam piece. Cut out the bag bottom.
· Fuse both squares of the Deco Magic/Stitch n Shape together.
· Tape smaller circle pattern to the Deco Magic/Stitch n Shape piece and cutout the circle to stiffen the bottom of the bag.
12. Insert Bottom-
· Stitch around the entire bottom of the bag, 3/8” from the edge.
· Clip about every 2” to the stitching.
· Fold the side seams together and mark the folds to mark the quarters of the bottom.
· Fold the bottom circle in fourths and mark the quarters.
· With the sides of the bag wrong sides out, place the bottom circle inside the bottom, match and pin or clip the quarters together. If you are pinning, make sure the points are towards the center of the circle.
· Pin or clip the remaining areas. As you pin/clip you will need to open the edge of the bag by opening the clipped areas to fit around the circle.
· Stitch around the bottom from the top side not the circle side.

13. Handle-
· Fuse the piece of Deco Magic/Stitch n Shape to the center of the fabric strip.
· Place a piece of RNK Stitch Perfection Tape down the center of the Deco Magic/Stitch n Shape. Peel the tape.
· Fold the raw edges of the fabric to the center and stick to the tape.
· Glue the ribbon/bias tape down the center.
· Stitch the sides of the ribbon/bias tape to the handle with fun thread and a fun stitch.

· Place the handle inside at the side seams with the right side of the handle facing the right side of the bag. Clip in place and baste with a 3/8” seam.

14. Lining-
· Place the raw edges of the 12” right sides together. Pin together.
· 2 ½” from the edge, start stitching off the raw edges, onto the lining and pivot at 5/8” from the edge and then stitch a 5/8” seam to the edge. This will leave a 6” opening in the center.
· Follow steps in the “insert bottom” section above to insert the bottom of the lining. EXCEPTION-Use a 5/8” seam when stitching.
15. Insert Lining-
· Fold and mark the quarters of the top edge of the lining. Also mark the quarters on the outer bag.
· Place lining inside the outer bag. Bag is wrong side and lining is right side out.
· Match the quarter marks and pin or clip the lining to the bag around the top.

· Stitch around the entire top edge from the lining side with a ½” seam. Take your time. Stitch a couple of inches and readjust.
· Pull the bag right side out through the opening in the lining.
· Insert the bottom stiffener piece through the hole and work it down into the bottom of the bag.
· Fold the lining/bag and the top edge and clip all around the top.
· Topstitch ¼” away from the entire top edge.
· Fold both layers of the lining opening along the pressed fold line. Pin the opening closed and topstitch the opening about 1/8” away from the edge.
· Push the lining into the bag.
Happy Halloween!

