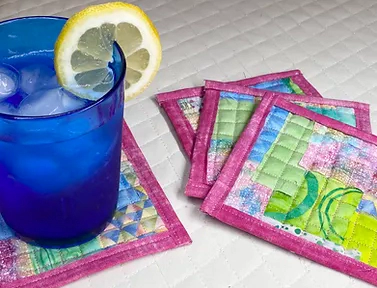
These useful coasters have a cork base and a quilted surface. Made of scraps, are easy to sew and are great as a gift item. Hi, This is Susan from Sewfeet.com, and today’s post has some of my favorite techniques and uses some of products, so let’s get started!
Supplies
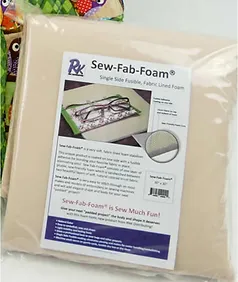
Four 6” squares of Sew-Fab-Foam (foam stabilizer).
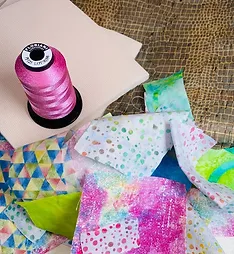
Assorted scraps of any size and any shape.
Four 5” squares of cork fabric – cork is great for backing coaster because it is water-resistant. The cork I used was made to look like crocodile skin.
Floriani 40-wt. thread in any color – you can choose a color that blends with your scrap fabrics or select one that highly contrasts such as black or white.
Four fabric strips or binding, 1” x 24” each.
Sew-Fab-Foam
This has become my favorite filler material for projects such as purses, tote bags, table runners, placemats, and coasters. I like it because the quilting is very defined and shows a lot of dimension in my projects. It is tricot covered foam and one side is fusible, which is perfect for making our collage coasters.
Creating the collage
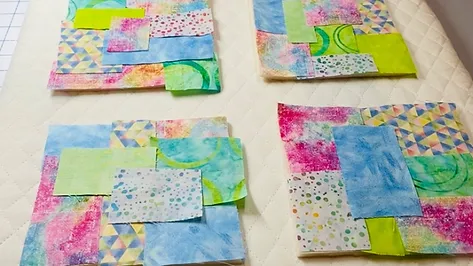
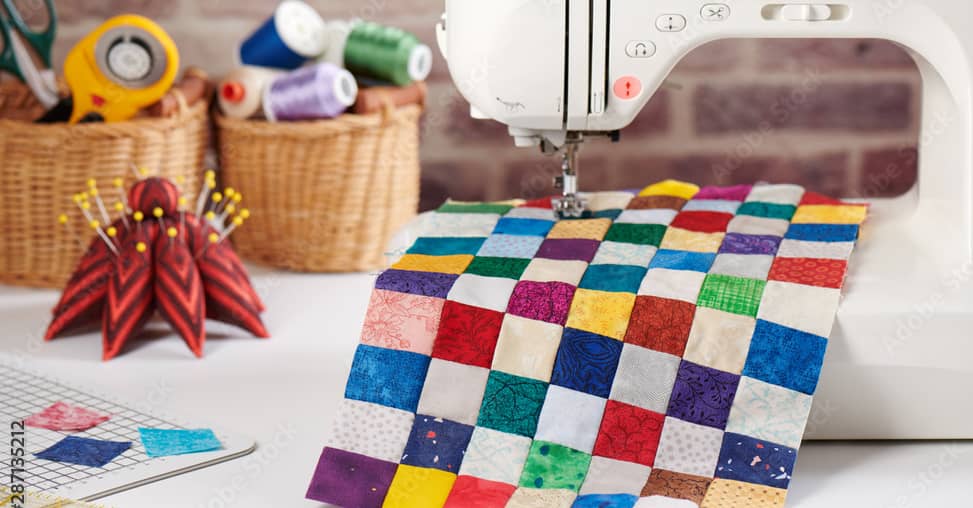
Collect your scraps. I used the same assortment of fabrics for each coaster to coordinate the four coasters, but any fabrics and any colors will work for this project. Place the Sew-Fab-Foam squares with the fusible side up. Cover each square with assorted scrap fabric pieces. Position them as desired, overlapping the edges, and making sure the entire square is covered. I cut most of the scraps into small rectangles and squares with straight edges. That’s one way to create the collage but anything will work – triangles, circles, organic shapes, etc.– the most important thing is to completely cover the foam with fabric.
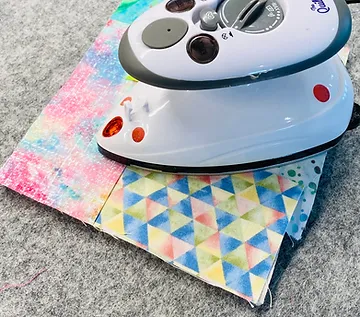
Fusing the Foam
Once the foam is covered, fuse the fabric to the foam. Note: Because the fabrics are layered, there will be some scraps that are not touching the fusible surface. Fuse what you can and put the top pieces in place when you start to sew.
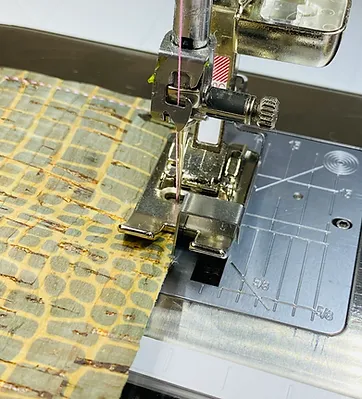
Stitching the Coasters
To secure the fabrics, you will stitch all-over the surface of the fabrics. Any type of stitching will work – straight stitching, free-motion stitching, or even decorative stitching. For these coasters, I sewed a straight stitch grid with approximate ½” spacing. I used an all-purpose presser foot and adjusted my needle position all the way to the left. When stitching, I guided the edge of the presser foot along the previous line of stitching. Sew lines of stitching across the surface of the coaster. Then turn the coaster 90 degrees and stitch lines over the coaster to create a grid. Tip: If the presser foot is dragging or pushing as you sew, decrease the pressure until the coaster moves smoothly under the foot.
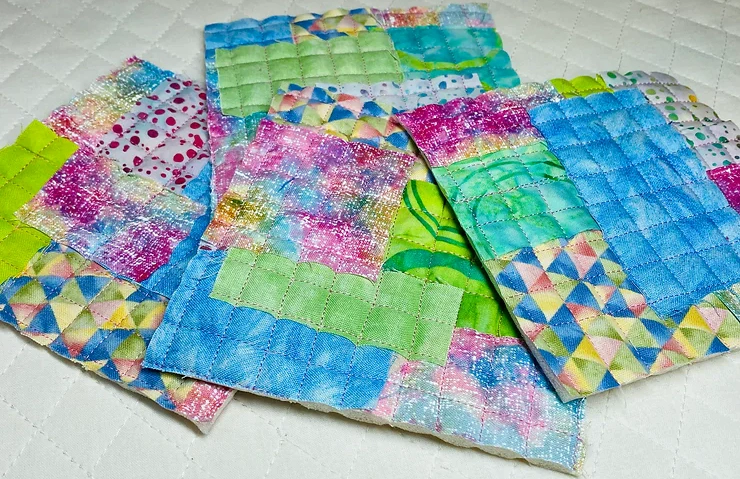
Trimming the Coasters
After stitching, trim each coaster to 5” x 5”. I used a Quilters Select 5 1/2” ruler to trim my coasters. After I trimmed the first one, I placed it on top of the next one to use as a guide for size until I had all four coasters trimmed.
Cork Backing
Place the cork square and the coasters wrong sides together and clip the edges to hold the layers together. Using an edgestitch foot, stitch the layers along all four edges, adjusting the needle to sew about an 1/8” from the edge. Tip: Sew this from the cork side because the layers tend to slide if the cork is on the bottom.
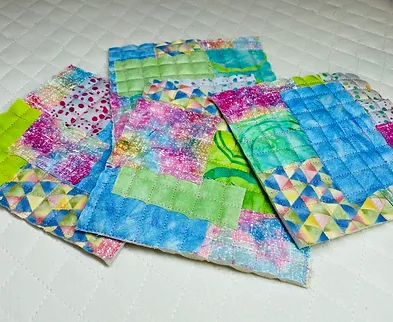
Binding the Edges
This raw-edge binding is an easy-to-sew edge binding and is a good choice for these coasters. Cut the four strips into four smaller strips, 6” each. Fold each strip in half lengthwise and press. Place a strip over one side edge of a coaster, making sure the edge of the coaster is full inserted into the fold of the binding strip. The strip should extend about ½” beyond the upper and lower edges of the coaster. Using the edges foot, stitch along the binding to secure it in place. Trim the binding even with the coaster. Repeat on the opposite side edge of the coaster, then bind the upper and lower edges in the same way. Bind the remaining three coasters.
RNK Distributing, is a distributor of sewing and quilting notions, tools, and supplies. To find a retail store that sells Quilters Select products, CLICK HERE.
To learn more from and about Susan Beck, visit SewFeet.com. Happy Stitching!